Halo
Halo: Combat Evolved Anniversary Walkthrough and Guide
by CMBF ![]()
Halo
--== Begin Enemy Units ==--
(1) Grunts -- Low-level blue and red grunts; grenades and plasma pistols.
(2) Elite -- Medium-level blues and Higher-level Reds; effectively utilize cover / Plasma / Melee
(3) Jackals -- Medium-level; good cover skills / Harsh Melee & Rush.
--== ==--
The next level is called "Halo" and it begins -- as most of the levels do -- with a rather involved CS that sets up this part of the story.
Basically your main objective is to locate and provide assistance to the Marines whose lifeboats crash-landed on the planet surface, helping them defend against the Covenant forces while you wait for a transport to arrive that will evacuate them to the newly established staging area.
In the process of completing the primary objective you will encounter some of the surface structures in the planet and, after entering them, their below-ground areas. Bear in mind that this is a ringworld, and it has structures that support the ring network, which we now know is a massive weapon -- but more on that later.
--== Halo Chapter and Level Tips ==--
Before you get too far into this level there are a couple of things you should be aware of, starting with the Achievements that are available on this level...
-- Halo (25 GS) - Complete the level "Halo" on any difficulty.
You unlock this for simply completing the level, and there are no special tips or things you need to do to get it.
-- No-Fly Zone (10 GS) - Destroy three of the four Banshees on "Halo" on any difficulty during a single play-through.
When you start the level there will be a pair of Banshee that attack you but special care must be taken if you want to shoot down both of them because as soon as you shoot down one, the other one will immediately bug-out. There are four Banshees in total in this level, so failing to shoot down the second one here is not a deal-breaker because the second pair, which you encounter in the process of rescuing the third set of Marines, does not run away.
But if you are determined to take out both of the first pair your best approach is to use either your rifle, pistol, or SMG and damage each until they are smoking, at which point you switch to pistol ONLY, and then you only fire at them when they are grouped close together, alternating which one you shoot and shooting only a SINGLE shot into them. Using this tactic you will whittle away their HP until, finally, you shoot one down, at which point you then concentrate as much fire power as you can at the remaining one before it can fly out of range. If you do this properly you will have no trouble shooting both of the Banshees down from the first pair.
The second pair attacks you when you are out in the open in the process of reaching the third and final lifeboat and group of Marines. They are aggressive in their attack on you which makes this a lot easier than the previous pair, who did a lot of evasive flying. The most effective approach is to concentrate on them one at a time, and use what cover that there is to let your shield recharge when you need to. If you shot down both of the first pair, the Achievement will unlock as soon as you shoot down the first of the second pair.
-- How Pedestrian (25 GS) - Complete the level "Halo" on any difficulty without entering a vehicle.
This Achievement can be a bit more complicated to unlock if you do not have a partner to work with but it CAN be done solo, as long as you have a second gamepad to use as the foil for the level.
Co-Op: Have your partner take possession of the Warthog that is dropped off by the transport and use it to progress through the level, with you following behind on foot. DO NOT get into the Warthog as the passenger -- riding inside the vehicle in any capacity prevents this Achievement from unlocking. As your partner progresses through the level they will reach the controls for the light bridge that is beyond the gap that you can only pass by jumping it -OR- if you are alone, by using a grenade to blow yourself over the gap (more on that in a bit).
You need to wait at the entrance to the tunnels so that after they jump the gap and proceed to the controls, raise the light bridge, then get back into the Warthog and cross they will now be far enough away for the games automatic warping system to determine that the distance between you and your partner is too great, and you will be warped to the location your partner is at on the other side of the gap, thus making it unnecessary for you to deal with the gap at all!
Once that happens simply finish the mission on foot, never getting into a vehicle, and you will unlock the Achievement -- making this one of the more annoying and time-consuming Achievements in the entire game!
Solo Play: You CAN unlock this solo, either by using a second gamepad and simply driving the Warthog over the gap and then over the bridge to get your character warped to them, and then complete the level on foot with or without the help of the second character, or you can stand on the lop of the gap and drop a concussion grenade at your feet so that its explosion blows you across the gap.
If you do that you will need to allow your shields to recharge before you proceed to the bridge controls, taking out the enemy that stand between you and the controls, then activate them and cross the bridge on foot, completing the level sans-vehicle.
WARNING: If you are using the gamepad OR you are playing with another human player and they manage to get themselves killed in the process of activating the bridge controls before you get warped over, the only option you will have is to use the grenade trick because they will re-spawn on the wrong side of the gap, with their Warthog where they left it, parked by the bridge!
Note that this is the first level where you get access to a Sniper Rifle - and it can be very useful in dealing with the enemy in the second half of the level, but when you are shooting down the Banshees you will find that the Pistol or the SMG are far more useful to you than any of the other weapons.
You should already have the Achievement "Looks like an Oddball" and "What have we here?" for finding the first Skull and first Terminal from the Pillar of Autumn level, but as there are Achievements for finding half and then all of the Skulls and Terminals you should still make an effort to locate and collect them, right?
Basic Walkthrough
You begin at a decided disadvantage -- your lifeboat has crash-landed on the surface and you appear to be alone. Get out and pick up any ammunition and kit that is scattered about and then head to the gap on the left and cross the narrow bridge here, taking shelter behind the boulders on the other side and watch as the Covenant forces arrive. They are searching for survivors to mop up the remaining enemy and really have no idea that the Master Chief was on that lifeboat -- if they did you would be facing a division not a squad.
After the initial squad arrives a pair of Banshee will also arrive ostensibly to provide air cover for the ground units -- read the notes above for the related Achievement -- so you will need to take one or both of the Banshee out before or after you take out the squad closest to you (they will cross the bridge and are mostly grunts).
Before you do anything else, now that it is safe to do so cross back over the bridge, make sure you did not leave any kit on the ground by the lifeboat, and then follow the path on this side of the gap in the general direction of the waterfall, where you will find the next skull laying on the ground just past a boulder. Pick up the Mythic Skull, and then head back over the bridge and follow the path to where you drop down and engage the next enemy squad before you find the first of the three lifeboats.
This can be a little confusing since the level appears to suggest that there are three lifeboats you need to secure but that count really only begins just before and just after the tunnels so it is best not to fixate on it.
--== Lifeboat 1 ==--
After you clear the area around your lifeboat and proceed down to the area where the next lifeboat is located you will encounter three independent squads involved in this mop-up operation very close to one of the ring support buildings -- the first pair are already on the ground when you arrive, having just been dropped off by one of their Dropships -- so let that fly off before you engage them, right?
Take out the squad that is between you and the structure, and then the other across the valley that is firing at the Marines as it approaches. The third squad will be dropped off by another Covenant Dropship, so wait for that to clear the area and then take them out.
I should not have to warn you that each of the Dropships has a set of gun turrets on it, or that the Covenant grunts manning the turrets will use them on you. Your smartest tactic here is to pick off the nearby enemy with head-shots using the limited range scope on your pistol, being careful to not give away your position by starting with the closest and working your way out.
After the Dropship arrives and drops off the third squad, wait until it clears the area and then begin seriously picking off the enemy as it does not matter if they see you at this point, as invariably they will. When they are all dead, approach structure here where the Marines have taken shelter -- there are ramps on either side that lead up to the level above, where you will find some medpacks (first aid kits that restore health) as well as ammunition and grenades. Take what you need and then get ready for several waves of enemy who will be dropped off by Dropships.
Basically in addition to needing to sit out the timer to arrange rescue for these guys, you also need to clear out the initial enemy presence, and then survive the waves of enemy who will attack. The Covenant appears to be serious about wanting to take out the Marines here!
The best strategy seems to be to use the elevation of the structure as your defensive point as the enemy will try to come up the ramps there -- so watch the radar and simply change to the side that they enemy is attacking from as needed and kill them! Keep an eye on your shield and duck into cover when you need to and let them recharge -- the idea here is to not need those medpacks, but they are there if you do...
The biggest threat from these attacks is the Needler-armed grunts and Elites since it only takes a few of them to get enough a concentration of needles into you to ruin your day. Just keep an eye on your shields and make effective use of the pile of grenades that are laying near the medpacks on top of the structure and you will be fine!
Mythic Skull, Boom Skull and a Terminal
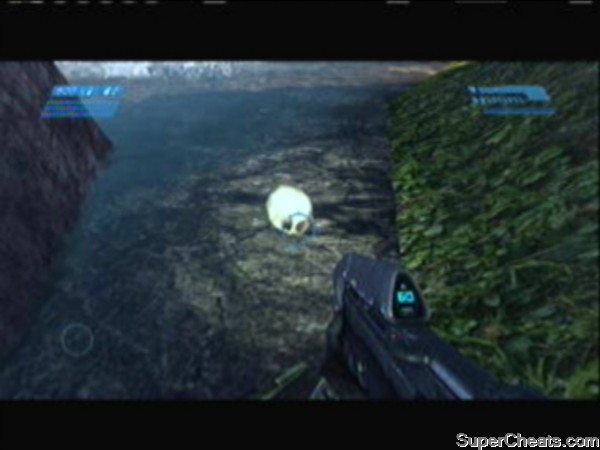 The Mythic Skull |
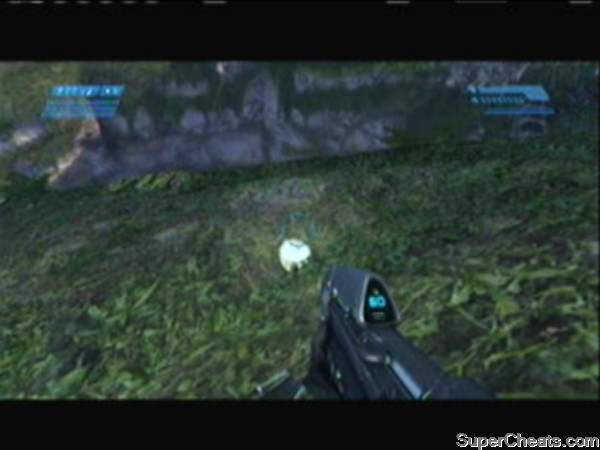 The Boom Skull |
Once the battle is won you will have a radio cat between Cortana and the rescue ship, and then they will arrive, dropping off the Warthog that is your ride for the second half of this level -- though IF you are working on the optional Achievements for this level you may want to review the advice provided at the start of this level before you climb into that Warthog...
On the other side of the Tunnels the locations of the lifeboats are helpfully marked by blinking lights that are outside of the entrances to the narrow canyons that lead to the open areas where the lifeboats have crashed and, conveniently, where you will find the boats, survivors, enemies, and some permanent facilities including part of the support infrastructure for the rings above.
--== The Tunnels to the Operations Area ==--
The next set of lifeboats are located in the area on the other side of the mountains, and to reach that we have to go through a set of tunnels with a large base area that is part of the support system for the rings. Inside are enemy, so it is not a cakewalk, but it is also not a serious impediment provided that you go careful and think out your moves.
As you approach the entrance to the tunnels but BEFORE you enter, follow the cliff face around to the right until you can climb up, then follow it back left towards the entrance to the tunnels and you will find your next Skull -- The Book Skull -- laying on the ground here.
Collect that now and save the game. Note that you now have three skulls in your collection, so in theory if you wanted to after you finish this level you could go back to the first level (Pillar of Autumn) turn on the three skulls and set the difficulty to Heroic, and run through that level again real quick to unlock the Achievement "Tsantsa" (50 GS) for completing a level on Heroic with three or more skulls active.
Please refer to the Tips part of this Section on obtaining the conditional Achievements as that also provides you with strategies for getting through the tunnels area.
After you go down the sharp ramp that is maybe four or so turns into the Tunnels you will see a short side-alcove that has a blinking yellow and blue beacon -- this is the next Terminal that you need to access in order to collect. When you do that you will get another CS of the Spark and his take on the events that have lead up to the current situation -- this really is worth watching in addition to being required if you are collecting the Terminals -- which you should be because hey, an Achievement is an Achievement, right?
These reports that the Spark gives you are going to be wicked important when they finally release Halo 4, since this is all foreshadowing for that game -- and as I say, it is worth watching because it does not spoil anything and later you will be glad you did because it makes absorbing the entertainment capacity for the games all that much easier.
You need to jump the gap ahead then fight your way to the bridge controls and raise the light bridge, then drive across and exit the Tunnels. After you emerge from the other side it is time to locate and rescue the last two lifeboat groups. You get a checkpoint save when you exit the Tunnels.
--== Lifeboat 2 ==--
The next area is pretty easy to find -- just follow the path sticking to the right up the hill and then down, and as you approach the river the entrance to the canyon (marked by lights) is a hard right BEFORE you reach the river. If you actually reach the river, you have gone too far, so turn around and head up and to the left now, and you will locate the entrance.
Proceeding through the canyon you should stick to the left along the wall and you will come to another canyon entrance that is a little hard to see but, when you get inside of it you will see at the other end another set of blue marker lights and a path that leads up on the right side of the area... Follow that and you will jump a river from a bluff above and find yet another set of marker lights leading to an open area with another building which is the source of the flare-like light that keeps appearing in the sky.
Take out the enemy outside of the building and then Cortana will tell you that there are Marines in the hills above -- but really you want to clear the enemy out first -- as after you do that Cortana contacts the rescue ship and you hear their conversation including the locations of more survivors and boats.
As noted at the start of this level there will be Red Elites mixed in with the enemy you face here, and they should be given a slight priority when you are fighting the squads as taking them out quickly and early is a really good idea. Remember that one of the "enemies" that you are fighting in this game is the enemy called attrition -- when you lose health, when you have to empty a clip, or when you use up some other weapon or resource that is not easy to replace, you are losing to the enemy called attrition.
Be sure to re-supply from the kit scattered around the lifeboat and then continue to the next area!
Completing the Final Rescue
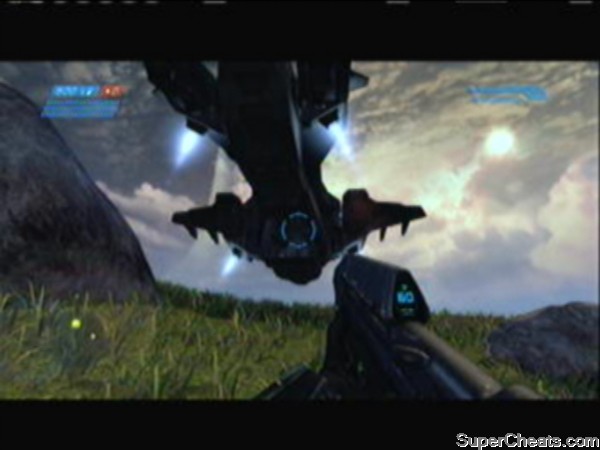 The Bugout Ride |
--== Lifeboat 3 ==--
If you go to the lifeboat and run in the direction that its bow is facing and a little to the left you will enter a canyon that is a little hard to spot unit you are right near it -- the other end of it is lit by a set of markers -- and this is where we want to go. As we enter the open area on the other side we are attacked by the second set of Banshees -- battle them and shoot them down (there is a boulder near the entrance that you can use as partial cover here), and once they are shot down head into the area and you will follow the river to another set of markers (there is a red target marker on the screen in this direction as well).
When you head out of this short canyon you will be in the next open area and you will quickly spot the scar where the lifeboat tore up the grass as it landed (crashed). Head over and pick up the kit and ammunition there and, if you look to the left of the entrance hatch, you will see a Sniper Rifle. Whether you pick it up or not is your call -- I did, but mostly because I like that particular weapon and I am good with it, but also because it allows you to bring the fight to the enemy from a distance.
This is good practice if you are not familiar with the weapon as it will let you get a better idea of how far you need to be away from the targets to be able to shoot them without your position being compromised but be aware that after you take out the first group that lands a series of squads will arrive and you do NOT want to be sitting under one of their landing sites when they do, since you will quickly be overwhelmed by them and die... And that is not the preferred result here.
Sadly the survivors from this lifeboat were all wiped out before we arrived so there was nobody to save, but despite that this is what you call a target-rich environment! After the reinforcements arrive pick them apart and Cortana warns you that the Covenant has located and captured the entire command group from the Pillar of Autumn -- you need to find and rescue the remaining survivors and then try to rescue the officers from the ship next!
--== Lifeboat 4 ==--
After you clear out the bad guys head through the canyon and into the next open area following the marker to locate the next lifeboat -- grab the kit here to re-supply and then head in the direction that the stern of the lifeboat is facing and you will come upon a squad that is blocking your access to the path on the left -- take them out and then make your way up the marked slope here to find a large structure at the bottom of a slope.
Now here is a chance for you to give the Sniper Rifle a good workout!
You really should be able to pick off the majority of the enemy from above but I would concentrate on the elites and the shield mutts as the grunts are easy to take out with your mg -- either way though once you have them managed head into the base of the structure and down a level where you eliminate some grunts and then find the Marine survivors on the next level below. Take out a few Jackals that were engaging them on this level and then lead them to safety and call for extraction.
At this point you may need to clear out a handful of enemy from around the second building, but once you do the rescue ship will arrive and as these are the last group you climb on board with them for your own evacuation and the end of the level! Well done!
More for this game on SuperCheats.com
well i've tried 2 jump over tht gap and my frnd and i always fell we never made it across