Tayari Plaza
Halo 3: ODST Walkthrough and Guide
Halo 3: ODST Guide - Walkthrough
Tayari Plaza
Tayari Plaza
Character: Buck
Achievement: Tayari Plaza
Objective: Find Dare’s crash-site
Wait on the ledge until the Phantom unloads a group of Grunts and Brutes. Remain on the ledge until a few of the Grunts come forward, then aim for their heads and pick them off with your Magnum. When the area below is clear, drop down and get your hands on a Plasma Pistol; one or more of the Grunts will have been carrying one. Swap out your Assault Rifle for the Plasma Pistol and continue north down the street.
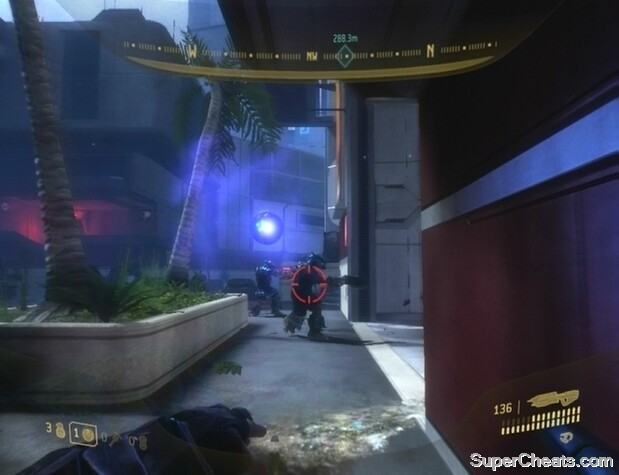
With your Magnum equipped, headshot any further Grunts you encounter and look for a Brute by the pillared building along the northeast side of the street. When you reach the purple barrier just before the building, use your Magnum to kill any Grunts nearby and then switch to your Plasma Pistol. Charge a shot by holding RT and when fully-charged, take aim at the Brute and fire. If the shot hits, quickly switch to your Magnum and headshot the Brute to finish him. Be careful, as he’s armed with a Brute Shot. Any Grunts in the immediate area should scatter once their leader is dead, allowing you to effortlessly pick them off. There is another Brute further up; use the same strategy to dispose of him.
Killing a Brute with the Plasma Pistol and Magnum combo.
When the area is clear, follow the marker on your compass to encounter a couple of allies. If one of your weapons is low on ammo you can trade weapons with one of your allies by holding the RB button when prompted. At this point, you’ll want to trade your Magnum for an Assault Rifle, since you’ll need the extra firepower very soon. Use the Optican kiosk north of the flatbed to restore health if need be, and then follow your allies to the alley.
You’re faced with five Brutes here. If you still have a Plasma Pistol, save it to remove the armour of the Brute Captain (gold armour) who is wielding a Brute Shot. Look for an unlocked door into the building southeast of where your allies take position and head through.
Once in the building, turn right and approach the door at the end of the corridor. Don’t head through just yet; wait in the doorway for a Brute to appear outside, and then use your Assault Rifle to gun him down. Hang back until you hear signs of battle outside, then step through the doorway and turn right. A couple more Brute infantry will be preoccupied with your allies, so try to stick one with a Plasma Grenade. You can find additional Assault Rifle ammo next to the downed UNSC marine directly across from the doorway.
 Stick preoccupied Brutes with Plasma Grenades or Spike Grenades to quickly put an end to them. |
When only the Brute Captain remains, rush out with your Plasma Pistol equipped and hit him with a charged shot to remove his armor. Then, quickly switch to your Assault Rifle and finish him off. Hit him with a melee attack if he charges and misses.
Before moving on to the next area, pick up the Assault Rifle dropped by your allies if they didn’t survive the skirmish and swap your Plasma Pistol for the Brute Shot dropped by the Brute Captain. Some Grunts will come from the north, so hang back and take them out with your Assault Rifle before continuing down the street.
The biggest threat in the next area is the Grunt on the mounted Plasma Turret. The Plasma Turret is mounted on the platform along the northeast side of the street. Hang back just out of range, take aim at the plasma container to the right of the turret and fire to disable the mounted Plasma Turret. Save what Brute Shot ammo you have left and switch to your Assault Rifle. Use it to kill the Brute and Grunts further up the street. The Brute Shot also makes for an effective melee weapon.
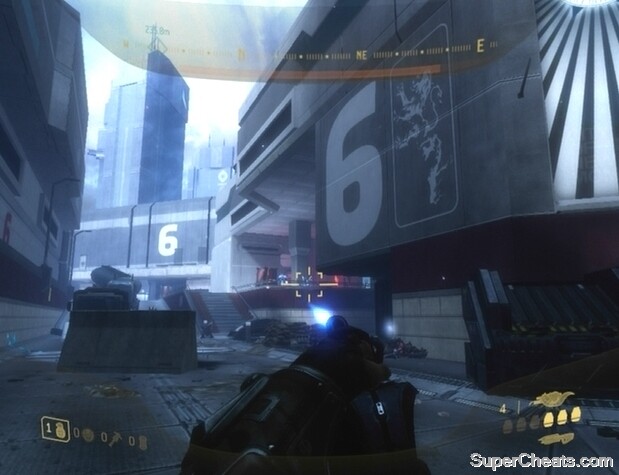 Target the plasma container with a Brute Shot to take out the gunner. |
Pick up the detached Plasma Turret before moving on. The next area is full of Grunts and Jackals. Mow down the Grunts and Jackal as you make your west. Keep moving; if you have a decent amount of health remaining, you should be able to plow your way through to the security door. The Jackal Sniper in the purple tower is armed with a Beam Rifle, so take the gravity lift up and melee him to death. Before moving on, look for a Carbine (one of the Jackals will have been carrying one) and swap your Brute Shot for it.
When the area is clear, approach the security door at the west end of the street and hold the RB button to open it. Upon entering the next area, step onto the walkway to your left and look for an Optican kiosk along the building there. Take one of the health packs to restore any lost health and then swap your Brute Shot (if you haven’t already) for the Carbine by the dead Jackal.
Proceed through the doorway at the other end of the walkway and turn right. Activate VISR, start down the corridor, and turn right when you can. Approach the security door, but don’t head through when it opens. Instead, use your Carbine to eliminate the three Jackal Snipers on the bridge, a fourth sniper on the walkway to the west, and a fifth sniper in the window far north of the bridge. There should also be a Brute wielding a Carbine at the other end of the bridge; use your Carbine to kill him, too. With that done, continue down the corridor. If you turn left at the dead Brute you can find a Shotgun next to a dead marine; hold on to your Carbine and swap your Assault Rifle for it.
 Use a Carbine to pick off the snipers on the bridge and surrounding platforms. |
Continue to the end of the corridor and proceed down the stairs there. Note the two health packs on the ground here. Hang back in this area and use your Carbine to pick off any Grunts you can see. There are a couple of Brutes among them, but wait until they’re close enough for your Shotgun to be effective. If a Brute spots you, fallback to the stairs and wait for him to approach. When he’s by the pillars, use them as cover while you blast him with the Shotgun.
When the area beyond the pillars is relatively clear of enemies, venture out and start heading north. There may be a couple more lower-ranked Brutes in the area, so have your Shotgun ready. There’s a Grunt and a mounted Plasma Turret on the walkway before the large door at the end of the street, so don’t move too far ahead.
Keep an eye on the large, locked door at the north end of the area. When the lights on the door turn from red to green, two Hunters will soon come through. Any enemies in the area will momentarily fallback while the Hunters get to work. As soon as you spot the Hunters in the distance, fallback yourself and take cover behind one of the pillars on the building along the east side of the area. If you have any Plasma Grenades or Spike Grenades, wait until the Hunters are close and then stick one anywhere to do some damage.
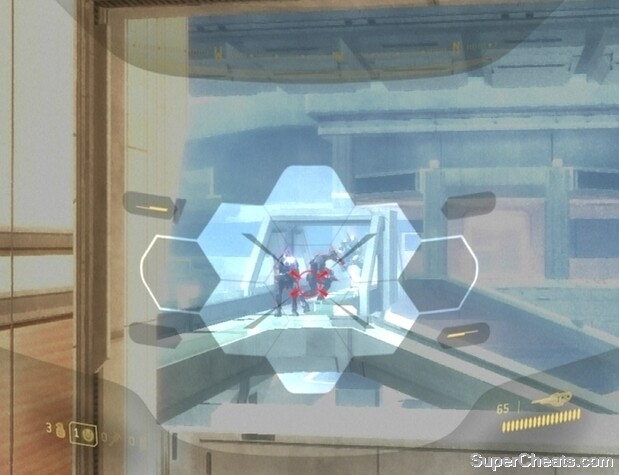
If you don’t have grenades, you’ll have to hit the exposed weak-spots on the Hunters’ backs to damage them. If you didn’t manage to take out the gunner on the Plasma Turret, fallback far enough to avoid taking unnecessary damage while facing the Hunters and wait for them to come to you. The projectiles shot by the Hunters are easy enough to dodge, but you’ll want to stay quite close to coax them into performing a melee attack rather than firing. Dodge the Hunter’s swings and other attempts to hit you until it lunges forward, at which point spin around and deliver two swift Shotgun shots to its weak-spot. Two direct hits to the exposed membrane are enough to take one out.
Using a Shotgun to kill the Hunters.
When both of the Hunters are dead, the enemies will once again pursue you. If you can get through the security door up the street, it will close behind you, so your best bet is to make a break for it and just run past the remaining enemies. Continue north through the security door at the end of the street to reach the crash-site.
Objective: Open crashed drop pod
Follow the marker on your compass to reach the drop pod. Kill the Grunts in the area and then approach the front side of the pod; hold the RB button when prompted to open it, completing the mission in the process.
More for Halo 3: ODST on Super Cheats
No comments yet. Tell us what you think to be the first.