10: Tree Farming
Farmville Walkthrough and Guide
by CMBF ![]()
Chapter 10: Tree Farming
There are three basic avenues for gaining income and points in the game -- crops, animals, and trees. The process for growing trees is a much longer one, requiring patience, but can also be a very profitable activity in the game.
Most players only discover the benefits and challenges of tree farming late in their game play -- and usually after they are a higher level -- but by learning about it and leveraging it from the start, you give yourself an incredible edge, and shorten the time that it takes to become a higher-level player.
There are three areas that we need to cover with respect to tree farming -- (1) Basic and Advanced Species, (2) Tree Mastery, and (3) The use of Orchards.
 The Five-By Method of Tree Mastery Farming |
(1) Basic and Advanced Species
There are usually two levels for each tree type -- Level 1 is the basic tree and for our example we will use the Cherry Tree.
The Cherry Tree is a Level 1 Tree that can be purchased from the Farmville Market for 225 coins, and that is available from the start of the game, to Level 1 Farmers. It has the most common growing time for trees in the game, being harvest-able every two days, and when you harvest it, it rewards you with 5 XP points and 18 coins for each Cherry Tree you harvest. You also obtain 1 Mastery Point each time that you harvest it.
When the Cherry Tree is placed in an Orchard, there is a random chance that harvesting the Orchard will result in obtaining a tree sapling -- but when it does you will receive a sapling for a Rainier Cherry Tree, and not a regular one. The Rainier Cherry Tree is the Level 2 Tree for this species.
Mastery for the Cherry Tree uses the following harvest table:
Level 1: 113 Harvests
Level 2: 226 Harvests
Level 3: 339 Harvests
That means you will need to harvest 678 times to Master the Cherry Tree, at which point you will receive a Mastery Sign and all of the usual bonuses that come with Crop Mastery.
The Rainier Cherry Tree has the same Mastery Requirements as the regular Cherry Tree, and can be harvested every 2 days for 5 XP and 54 coins, making it considerably more profitable to grow, but that is usually the case with Level 2 trees.
-- Basic Tree Farming --
The most basic method for tree farming in the game is to place trees along the edges of the farm and where you have space, usually grouping them tightly to maximize the number that you can place with respect to the space you place them in.
If you are concentrating upon crop mastering and have not increased the size of your farm yet, that makes sense, but your goal during the basic period should be to begin building Orchards, which you accomplish by purchasing the starter Orchard, and then "building" it by adding nails, boards, and bricks, until it is completed.
The game only allows you to have one orchard build in progress at a time, forcing you to complete one before you can purchase the starter for another. An Orchard can hold a total of 20 trees, and you will want to have constructed five Orchards at a minimum prior to beginning the Advanced phase of tree farming.
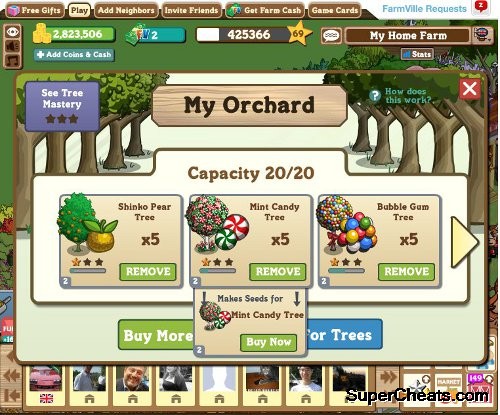
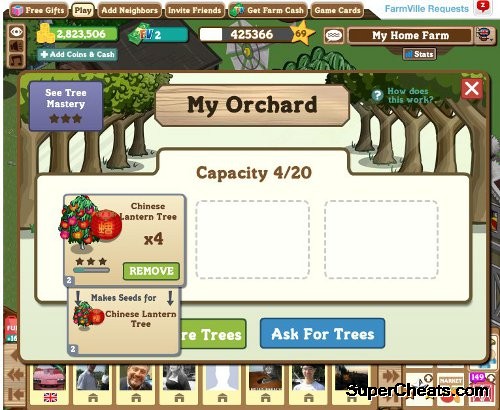
-- Orchards --
Found in the Market under Buildings and then Storage are the Orchards. There are actually two of them listed -- the first sells for 1,000 Coins, and is the kit that you place and then add Bricks, Boards, and Nails to to build, and when we talk about placing Orchards in the game this is the one we are referring to. The second must be purchased using real world money in the form of 30 Farm Bucks, and we are NOT referring to THAT one when we say buy and place an Orchard!
When you purchase an Orchard from the Market you are put into Placement Mode -- you then place it where you want it to be on your farm. If you have yet to actually free up the space that you wanted to place it on, no worries! You can pick up and move the Orchard any time you want to -- even when it has trees in it!
Once you place the Orchard you are shown its status menu -- and this indicates how much build progress you have in it. Each Orchard comes with one (1) Brick already placed in it, so to complete it you will need 10 Boards, 10 Nails, and 9 Bricks. On the status screen you can ask for more -- which will post a message to your wall telling your neighbors that you need Bricks or Nails or whichever you select.
Most players simply use the Special Delivery Packages that they receive as gifts to generate the building materials that they need -- since that is one of the primary features of that gift -- the game checks to see what it is that you need to complete the various outstanding projects on your farm and then gives you some of each when you turn in the packages. You should be aware though that you should never turn in more packages at any one time than items you need, because any excess ones will become things like Bees for your Beehive, and as you want to use those for building parts it would be a waste to have them turn into something you cannot really use to expand your farm!
Once the Orchard is placed and completed, the fence around it will be raised, and you can then begin placing trees inside. It hold four groups of five trees, for a total of 20, and it fills one line at a time -- so the first five trees you put in will line up in the first line (all the way in back) and so on. This is important to know if you are wanting to group a specific tree type together to make the Orchard look nice.
Using Orchards to organize your trees makes the process of harvesting them much more efficient -- but you should be aware that the special Arborist Helpers that you can get as gifts or rewards that you can use to harvest all of the trees that are ready to harvest on your farm do NOT harvest trees that are placed in an Orchard. You will have to do that yourself -- but you do harvest all 20 trees with one click.
-- Advanced Orchard Usage --
There are two systems that are popular with higher-level farmers with respect to Orchards: the 5-Tree Plan and the 5-Group Plan. The first is meant to decrease the time that it takes to passively master a large number of different tree types, and the second is used for retaining and mastering large numbers of tree types. We will look at each one separately.
Method One: The Five Tree Plan
Using this plan, you obtain (either from gifts, purchase, or growing seedlings) five of one species of tree, and then place all five in an Orchard. Generally speaking these are not trees that you are interested in farming saplings/seedlings from, they are just trees that you are parking to master in as efficient a manner as possible without the great expense of active mastery -- which we discuss in the next part of this section.
The Five Tree Plan allows you to have four species of tree in the mastery stage, and every two days you can harvest them, adding 5 Mastery Points to each. As you can see, the path to mastery is five times faster than if you just did one tree, which is what a lot of low-level farmers do. In addition to mastering the trees quicker, your farm looks nicer and more organized, which is something of a bonus.
Method Two: The Five Group Plan
This method is most often used by farmers who plan to retain breeding trees for every species of tree in the game. There are so many that keeping five of each -- which equals four species per Orchard -- is still a bit much. But retaining four of each allows you to hold five species per Orchard and still have them look nice on your farm. When using this method, you pick the five species you are going to place in the Orchard, and then place one of each so that they line up horizontally instead of vertically.
With this method, once you have placed them in the Orchard that is where they will stay, as you do not plan on breeding them, and you will not need to move them around outside of the Orchard. This method is most often used for the tree species that return the best profits per harvest, with the higher paying trees grouped together.
 Farming for Specific Seedlings |
-- Advanced Tree Farming --
Once you have your five (or more) Orchards built and placed, you will want to approach the process of Tree Mastery in a similar way to that of Crop Mastery -- with focus and intent. Having built your Orchards, place them together in a line -- usually along the back side near one corner or the other -- and then plant them all with the same tree crop -- in our example we use Cherry Trees.
That will give you 100 Cherry Trees being grown, which will quickly begin the process for acquiring the Level 2 Rainier Cherry Trees as you harvest your Orchards. Each time you obtain a Seedling you should plant and water it to grow it into the full tree, and then set the tree aside in a Level 2 Orchard (you will want to build five more Orchards for your Level 2 trees).
To sum this up, when you have the Advanced Tree Farm in full gear it will consist of a total of ten Orchards all lined up with each other, with the five on the right planted with Level 1 trees, and the five on the left empty, so that you can plant the Level 2 trees that you breed from the Level 1 Orchards. Chances are high that you will have fully mastered the Level 1 version prior to obtaining 100 Level 2 trees, but not always.
The objective here is to Master both the Level 1 and the Level 2 trees before you move on to the next tree species, so you will leave the Level 1 trees in place and producing fruit and seedlings for the entire duration of the grow.
Once you have your 100 Level 2 plants, you continue the grow until you have Mastered the Level 2 version, at which point you take one of each type and plant it somewhere on your farm as the seeder in case you want to grow more at a later time, and then you empty out the Orchards, and sell the trees. Once you have sold off the 99 Level 1 and Level 2 trees, you pick your next species and begin the process.
The trees you can purchase with coins make this an easy process, but the types you cannot require a little more preparation -- starting with a few Orchards set aside from the Level 1 and Level 2 sets, that you use for breeding those while you are in the process of completing Mastery of your current species.
Tree Farming is one of the most profitable side-efforts you can pursue in Farmville, and nicely compliments the main game play by providing you with colorful decorative objects that you can also profit from, making your farm unique and interesting.
More Farmville on SuperCheats.com
Why do some of my orchards harvest in 2 days & some in 3??
Giant Coin, and Royal Wedding produce the most coin per harvest. Having lots of orchards alternated with groves in the direction of the grove bonus increases mastery, and moving the trees from orchard to orchard makes mastery and gaining the coins/harvest fast.
I'm confused. I have at least a "zillion" trees and want to only keep those trees that are most profitable. I'll have to study this and see if it starts to make sense. TY for all your help.