Galaxy News Radio
Fallout 3 Walkthrough and Guide
Fallout 3 Guide - Walkthrough
Galaxy News Radio
|¯¯¯¯¯¯¯¯¯¯¯¯¯¯¯¯¯¯¯¯¯¯¯¯¯¯¯¯¯¯¯¯¯¯¯¯¯¯¯¯¯¯¯¯¯¯¯¯¯¯¯¯¯¯¯¯¯¯¯¯¯¯¯¯¯¯¯¯¯¯¯¯¯¯¯¯¯¯|
|ITEMS: {} Stimpak x3, [] Assault Rifle, [] Purified Water x2, [] Stimpak,     |
|       [] 5.56mm Rounds, [] Frag Mine x3, [] Bloodpack, [] Stimpak, [] Jet,   |
|       [] Frag Grenade x2, [] .308 Caliber Rounds, [] Whiskey x3, [] Micro-   |
|       fusion Cells x16, [] .32 Caliber Rounds, [] Med-X, [] Jet, [] Psycho,  |
|       [] Buffout, [] Scotch, [] Rad-X, [] RadAway x2, [] RadAway, [] Stimpak,|
|       [] 5.56mm Rounds, [] Flamer Fuel, [] Frag Mine, [] 10mm Rounds,        |
|       [] 5.56mm Rounds, [] Frag Grenade x2, [] Stimpak x2, [] Mentats,       |
|       [] Buffout, [] Pugilism Illustrated, [] Jet, [] Bloodpack, [] RadAway, |
|       [] Stimpak x2, [] Shotgun Shells, [] 5mm Rounds, [] Grognak the        |
|       Barbarian, [] Whiskey x3, [] Flamer Fuel x80, [] 5.56mm Rounds x2,     |
|       [] Jet, [] Buffout, [] .32 Caliber Rounds, [] 2x Energy Cell ~x30,     |
|       [] Flamer Fuel x81, [] Stealth Boy, [] Shotgun Shells, [] Bloodpack x2,|
|       [] RadAway, [] Stimpak, [] Nikola Tesla and You, [] Stealth Boy x2,    |
|       [] Bobby Pin, [] Rad-X, [] Stimpak, [] Nuka-Cola Quantum, [] Virgo II  |
|       Dish, [] Custodian Key for Tech Museum, [] Bottle Caps x200,           |
|       [] Buffout, [] Mentats, [] Gun Locker Key, [] 5.56mm Rounds x117,      |
|       [] Missile Launcher, [] Missile x2, [] Pulse Grenade x2, [] Assault    |
|       Rifle x3.                                                              |
|                                                                              |
|ENEMIES: o Feral Ghoul         o Raider     o Super Mutant    o Vicious Dog   |
|         o Super Mutant Brute                                                 |
|                                                                              |
|QUEST REWARD: 400 EXP, (Ammo Cache Key).                                      |
|                                                                              |
 ¯¯¯¯¯¯¯¯¯¯¯¯¯¯¯¯¯¯¯¯¯¯¯¯¯¯¯¯¯¯¯¯¯¯¯¯¯¯¯¯¯¯¯¯¯¯¯¯¯¯¯¯¯¯¯¯¯¯¯¯¯¯¯¯¯¯¯¯¯¯¯¯¯¯¯¯¯¯
Quest Flowchart:
1. Make your way to Dupont Circle.
2. Make your way through the subway.
3. Explore the Museum of Technology -> Find the Dish.
4. (Optional) Head to Washington Memorial and fix Relay.
Everything around here can be stolen, but there's not much of interest. If you are low on Stimpaks, search for the medkit on the north to find {STIMPAK x3}.
When you're absolutely done in the building, head downstairs and go through the door on the North. Head down another stairway until you reach a one-way door leading to the worldmap.
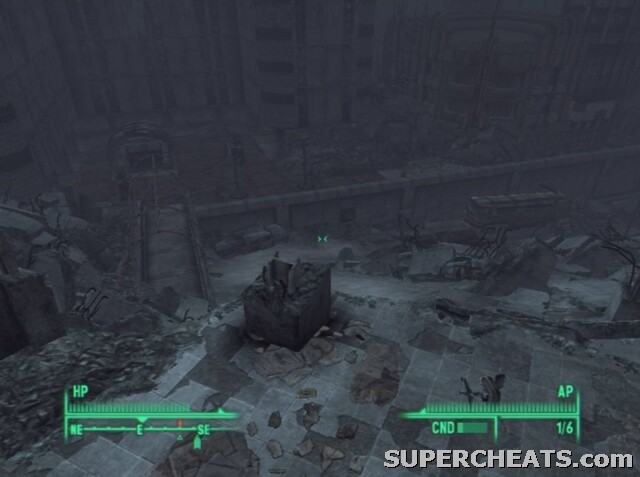 Drop down the floors – there's no turning back. |
Drop down a few platforms, the cross the bridge east. This makes a decent spot for killing several Ghouls down below. Check out the picknick table to the south from here and grab the [ASSAULT RIFLE]. You can find [PURIFIED WATER x2] and a [STIMPAK] in the First Aid Box, plus [5.56MM ROUNDS] and [FRAG MINE x3] from the Ammo Boxes on the ground.
You're nearby a Metro Entrance now, but that's not the route we'll be taking. Head down the lower path south until you reach a door leading to a Collapsed Car Tunnel. Enter...
You can sneak your way through here, but the explosions are so pretty.
| . |
Go through the walkway until you reach the tunnel. There are many Ghouls here, but you have three options:
1. Kill all the Ghouls and make your way to the southern end of the tunnel. ... 2. Sneak to the southwest end of the tunnel by staying close to the western wall. ... 3. See that entrance on the west? Sneak to it, and shoot at one of the larger trucks until it catches fire. Take cover and it will blow up, taking out many Ghouls. There is another truck further south, but your gunshots may attract Ghouls. The silenced pistol or a grenade will probably help here. At any rate, don't miss out the First Aid Box attached to the western wall, which holds a [BLOODPACK] and [STIMPAK x3].
Exit to Dupont Circle through by taking the door at the end of the walkway.
It's best to just head into the Metro by taking a right, but feel free to do some quick exploration of your surroundings. Make sure you get the message that you have explored this location, because that's the main reason we're here.
Optional:
At Dupont Circle, head north and kill as many Ghouls as you can before they reach you. Further north, a bunch of Raiders will also harass you - you know what to do. Before you proceed, be cautious. The bus stop on the northwest has a mine nearby, and the suitcase there doesn't hold much useful. Go directly for the two Raiders on the northwest. Grab a [JET] and [FRAG GRENADE x2] from the little table and [.308 CALIBER ROUNDS] from the Ammo Box.
Two Super Mutants lurk in the Metro Station, but you may have an ambush advantage. You can activate the Protectron by sneaking into the room north and hacking the terminal (25 Science), but you may prefer just shooting at their heads from the be-hind. Exit this tunnel by going through the door west, go down some stairs and open another tunnel to find yourself in more tubes. Joy!
Kill the dangerous Raider here and check the adjacent tube - especially the area on the north - to find [WHISKEY x3] on the shelves. The Ammo Boxes hold [MICROFUSION CELLS x16] and [.32 CALIBER ROUNDS]. You can even sleep here, that is, when you dispose of the Raider in the hallway up west.
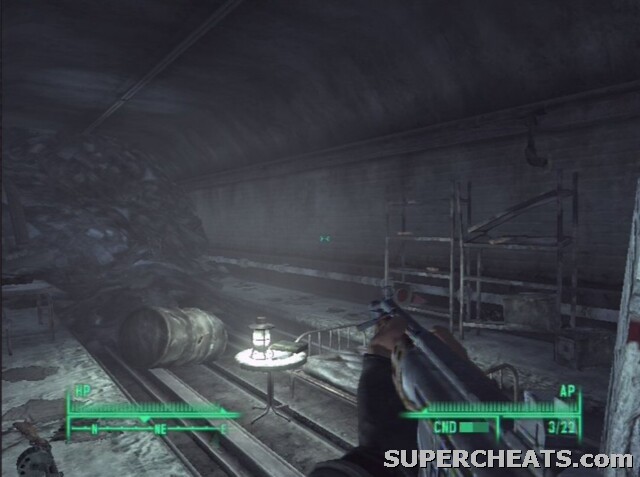 Looks like you stumbled on a little Raider establishment. And where there's one .. |
Grab a [MED-X], [JET], [PSYCHO], [BUFFOUT] and [SCOTCH] from the table in the walkway, and look on the shelf for a [RAD-X], [RADAWAY x2] and a First Aid Box with [RADAWAY] and a [STIMPAK]. The Ammo Boxes hold [5.56MM ROUNDS] and [FLAMER FUEL]. Quite a generous loot if I may say so.
Head down the stairs and prepare for a big battle. Four Raiders or so are waiting to rip you apart, supported by two automated Mark I Turrets. Take shelter and waste them all. You may want to use the terminal to disable the turrets, but you can also take them out with gunfire. I can imagine you get hurt in this battle, perhaps even severely. Remember the bed back in the tube? Use it to heal up!
Continue south to what appears to be a cave of some sorts. Proceed through the Utility Gate and loot a bunch of corpses, but beware! A [FRAG MINE] is planted near the bend of the tube, so you may either want to avoid it completely, or disarm it quickly before it can hurt you. Another one is a little further. Enter the next area, the Metro Central.
 .. there are plenty. |
You'll hear some nearby screams: Raiders are fighting off several attacking Ghouls. Join the fun and massacre everything in sight. The Ammo Boxes hold [10MM ROUNDS], two times [5.56MM ROUNDS], and you'll find [FRAG GRENADE x2] plus [STIMPAK x2] on the table. For the interested, grab the Pistol and Assault Rifle. Continue through the next walkway and quickly go around the bend due to the radiation level here. Waste a Ghoul or three, then proceed through either of the tunnels south. Both lead to a large area with many escalators and even more Ghouls. Ignore the escalators - waste the Ghouls that bother you - and head down another tube further south, on the opposite side of this large room.
A little bit in this tunnel you get the option to take a right, but this only leads to Ghouls and dead bodies with loot that isn't very interesting. Head more south instead and fight off the dogs, preferably with an Assault Rifle.
The tube splits, but take the left tube first. This leads to a locked door that can be opened with a 50 Lockpick Skill. Inside this storage room you'll find a stash of goodies: [MENTATS], [BUFFOUT], [PUGILISM ILLUSTRATED], [JET], and two First Aid Boxes on the wall with [BLOODPACK], [STIMPAK x2], and [RADAWAY].
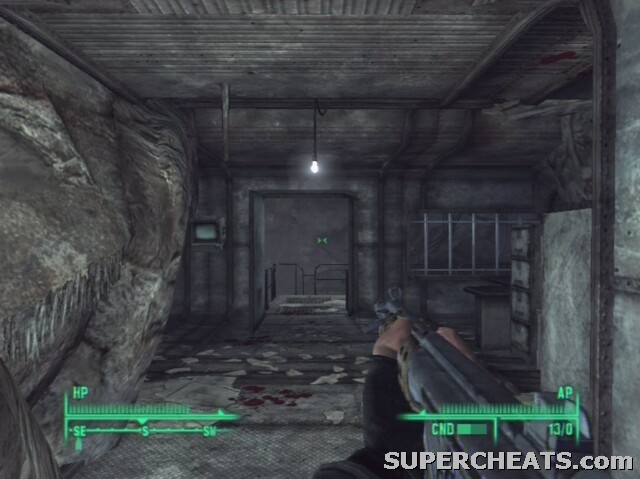
The tunnel leads to a dead end, so exit the tubes by going through the walkway attached in the other tube and enter the Museum Station.
Grab the [SHOTGUN SHELLS] right in front of you, along with the [5MM ROUNDS] from the Ammo Box. Proceed and kill the Ghoul around the corner, then use the switch on the wall to open the hatch at the top of the stairs. This will draw the attention of a Raider, so waste him.
Grab the [GROGNAK THE BARBARIAN] skill book from the table and search for a [WHISKEY x3] bottle if you feel like it. Continue your way until you reach more tubes. Ignore the north and head south instead. Raider encounters are surefire to happen, so be on your guard. When you reach another large area with escalators, search the SE corner for a Ammo Boxes with [FLAMER FUEL x80] and [5.56MM ROUNDS] twice.
Admit it. This is the reason you love Fallout 3
Climb the escalators, take the east path and stumble upon a table with a [JET], [BUFFOUT], and three Ammo Boxes holding [.32 CALIBER ROUNDS], [ENERGY CELL x28], [ENERGY CELL x31]. Another Ammo Box can be found behind some sand sacks further down the bend, which holds [FLAMER FUEL x81]. Exit the metro station by leaving for The Mall. Remember this area as you'll be making your return here often.
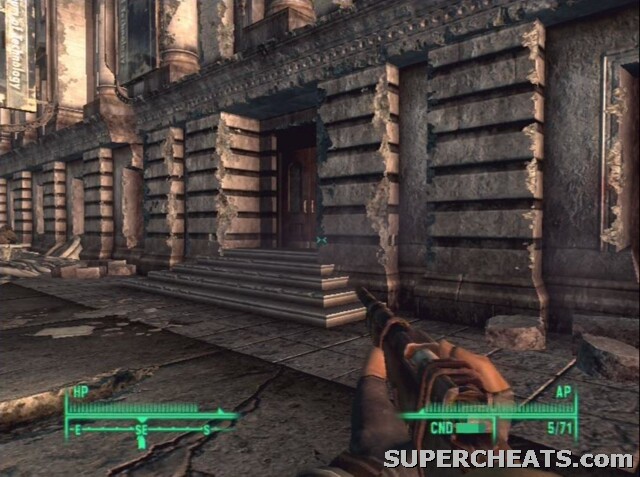 Quickly make a run for the Museum Doors; The Mall is a inhospitable place. |
Once outside, immediately make a run for the museum doors on your right (south-east from you). The surroundings are infested with 20 Super Mutants, and you don't want to pick a fight with them (and they do want to pick one with you).
The Museum:
Inside the museum hall lurk two Super Mutants. Kill them, then check out the west side of this room to find a [STEALTH BOY] on display and some [SHOTGUN SHELLS] in the desk with the terminal. Read the entries if you like, then move on to the only other working terminal in this room, located SE. Read everything and in particular the note about Jiggs' Loot. This starts up a puzzle. Check the terminal again and select #001. The correct number here is #019, so select this. Enter the nearby hallway, grab the [BLOOD PACK x2], [RADAWAY] and [STIMPAK] from the First Aid Box on the wall, ignore the restrooms, check the gore bag for goodies, and head upstairs.
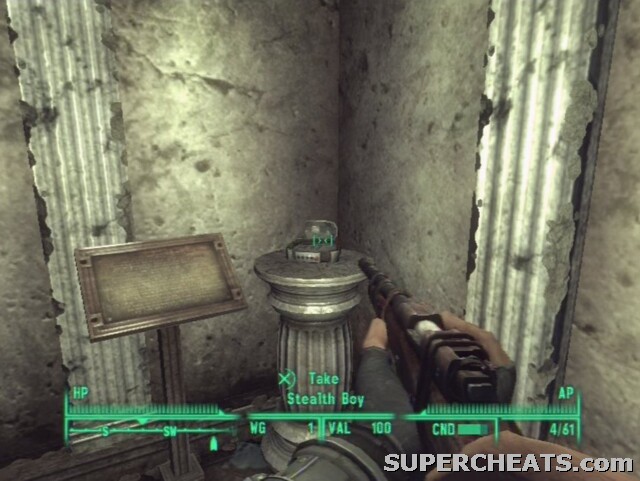 Stealth Boys grant you Predator-like invisibility. Optic Camouflage doesn't grant 100% invisibility but bends and curves the light so the object is barely visible to the naked eye. |
In the room you can grab a [NIKOLA TESLA AND YOU] from next to the terminal here and use the other terminal to activate the Mark I Turrets. They'll have no target information however, so it's best to just leave them off (unless you're planning on luring enemies to the main hall, sneaky bastard that you are :p)
The area east of you is a dead end, but you can find two more [STEALTH BOYS] here. Continue your way SW, ignoring the two terminals on the wall. Do the ‘Vault Tour' which is straightforward and leads you to the West Wing.
Spot the two terminals and use the right one to enter the number for terminal #002. The number here is #053.
The Atrium is to the south, but we'll get there soon enough. Head downstairs and into the planetarium. When the show begins to play, two Super Mutants will ambush you from behind, so be extremely cautious and kill them ASAP. Head into the small room to the east and find a [BOBBY PIN], [RAD-X] and [STIMPAK] in the First Aid Box. You can use one of the terminals to unlock the planetarium exits and the other to view several entries. Unfortunately, the Gun Cabinet requires a Lockpick Skill of 75 to pick. We'll get back to it soon, so for now, don't miss the [NUKA-COLA QUANTUM] on the shelf and head west of the planetarium.
 Oooh! Aahh! – Wait .. are those .. Super Mutants from be-hind? |
Move through the hallway and kill the Super Mutants in the room up ahead. Before exploring this hall, check out the stairs to your west in the hallway you just went through and follow them up to a security room with two terminals and a safe. There isn't much to do here, but remember the safe.
In the large hall, take what you came for: The [VIRGO II DISH]. Now take either the stairs or use the lower hall to reach the next room with a large rocket in the center. If you take the stairs, check the desk you pass for the [CUSTODIAN KEY FOR TECH MUSEUM]. This opens the door at the end of the hallway - which you can otherwise pick with a 50 skill.
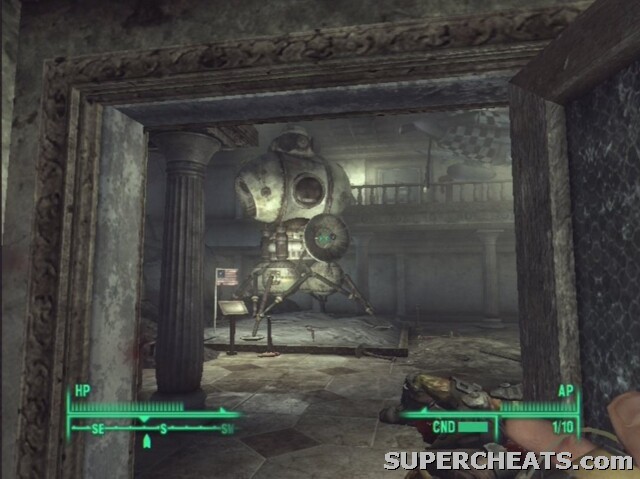 Grab the Virgo II Dish from the satellite. |
In any case, there are several Super Mutants drooling around. Waste them and start exploring this area. Most importantly, check out the terminal on the ground level of the area with the rocket. This is terminal #003, where you must input number #113. If you checked out all previous terminals, you should now be able to get the password.
With the password in hard, return to the security office room nearby the hall where you took the Virgo II Dish from. Use the terminal to unlock the Security Safe and snatch the [BOTTLE CAPS x200], [BUFFOUT], [MENTATS] and [GUN LOCKER KEY] from it.
With this key in hand, return to the office room near the planetarium and unlock the Gun Cabinet to find [5.56MM ROUNDS x117], [MISSILE LAUNCHER], [MISSILE x2], [PULSE GRENADE x2], and [ASSAULT RIFLE x3].
Back at The Mall, it's not a bad idea to try one of your Stealth Boys. Y’know. With all the Super Mutants chilling around.
Exit the museum through the front doors (the way you came in). The game has given you several Stealth Boys, and it's now's not a bad time to try one. You can also do without one - either way, sprint to the west, more specifically to the Washington Monument, you know, the huge obelisk. Two members of the Brotherhood will help you out if you're still being attacked. Once here, you have two options:
1. You can go inside the monument, ride the elevator up, (sleep in the bed) and activate the Relay system. Return to Three Dog and he'll tell you your father went to Rivet City - your next location.
2. You can head to Rivet City on your own, continue the Main Quests, and when you have completed the Tranquility Lane main quest, speak with Three Dog again.
He really wants you to complete his quest, so he throws in an additional reward:
A crapload of goodies that will be yours when you complete his quest.
I suggest you go for option 2, and head for Rivet City on your own.
Dude the tri-beam laser rifle is added by the dlc broken steel
one time i had no super mutants ambush me at the planetaium,but i think i killed them cause when i went into the west wing thair were two super mutats and i kalled thm and looted them.oh,yay and the planetairium show did not play.
While getting the dish for GNR I recovered a tri-beam laser rifle. But I dont see it listed in the weapons listing. Is this a weapon listed by another name? It has a monster kill at 60 per hit and takes the same ammo as the laser rifle.