Following in His Footsteps
Fallout 3 Walkthrough and Guide
Fallout 3 Guide - Walkthrough
Following in His Footsteps
|¯¯¯¯¯¯¯¯¯¯¯¯¯¯¯¯¯¯¯¯¯¯¯¯¯¯¯¯¯¯¯¯¯¯¯¯¯¯¯¯¯¯¯¯¯¯¯¯¯¯¯¯¯¯¯¯¯¯¯¯¯¯¯¯¯¯¯¯¯¯¯¯¯¯¯¯¯¯|
|ITEMS: {} Psycho, {} Jet, {} Carton of Cigarettes, {} Bloodpack, {} Stimpak x2|
|       [] Frag Grenade x3, [] 5mm Rounds x73, [] 5mm Rounds x142, [] Frag     |
|       Grenade x3, [] Shotgun Shells x10, [] Bobby Pin, [] Metro Utility      |
|       Gate Key, [] Purified Water, [] RadAway, [] Stimpak, [] Bottle Caps x35|
|       [] DCTA Laser Firearms Protocol, [] Energy Cell x55, [] Laser Pistol,  |
|       [] Nikola Tesla and You, [] Pre-war Money x2, Missile x4, [] U.S. Army |
|       30 Handy Flamethrower Recipes, [] Assault Rifle, [] 2x 10mm Pistol,    |
|       [] Frag Grenade x2, [] 5mm Rounds, [] Laser Rifle, [] Microfusion Cells|
|       [] Bloodpack, [] Purified Water, [] Stimpak, [] Nuka Cola Quantum,     |
|       [] Stimpak, [] RadAway, [] Rad-X, [] .32 Caliber Rounds, [] Carton of  |
|       Cigarettes, [] Bottle Caps x69, [] Energy Cell x34, [] Laser Pistol,   |
|       [] Fat Man, [] Mini Nuke x8, [] Nuka Cola Quantum.                     |
|                                                                              |
|ENEMIES: o Raider         o Protectron          o Mercs           o Mole Rat  |
|         o Feral Ghoul    o Feral Ghoul Roamer  o Super Mutant    o Behemoth  |
|                                                                              |
|QUEST REWARD: 300 EXP.                                                        |
|                                                                              |
 ¯¯¯¯¯¯¯¯¯¯¯¯¯¯¯¯¯¯¯¯¯¯¯¯¯¯¯¯¯¯¯¯¯¯¯¯¯¯¯¯¯¯¯¯¯¯¯¯¯¯¯¯¯¯¯¯¯¯¯¯¯¯¯¯¯¯¯¯¯¯¯¯¯¯¯¯¯¯
Quest Flowchart:
1. Go to Megaton.
2. Speak with Moriarty.
2.1 Speech Challenge him for the info.
2.2 Hack his PC/Lockpick the cabinet for the password.
2.3 Pay him 100 caps/deal with Silver the junkie.
3. Make your way through Farragut West Metro Station.
4. Team up with the Brotherhood of Steel.
5. Find Three Dog.
Note: Chances are you've gained a level from the 200 Experience gained fromcompleting the quest. I suggest you boost Lockpick to 45 (so that in combination with the Vault Utility Jumpsuit [ 5 Lockpick] you can pick many locks already). Advisable is to put the leftover in Science. As for Perks, I suggest you use the Intense Training to bring up STR.
When you gain your 3rd Level some time in the near future, crank up your Science Skill to 45 (combined with Vault labsuit = 50), and use the rest on Speech, which may be a little too low for comfort (and thus requiring an annoying amount of resets to get the desired result).
As for the Perk, either go for Intense Training. If you boost a stat, don't boost any stats of which you have 9 already (because you'll get those to 10 with the use of a Bobblehead sooner or later).
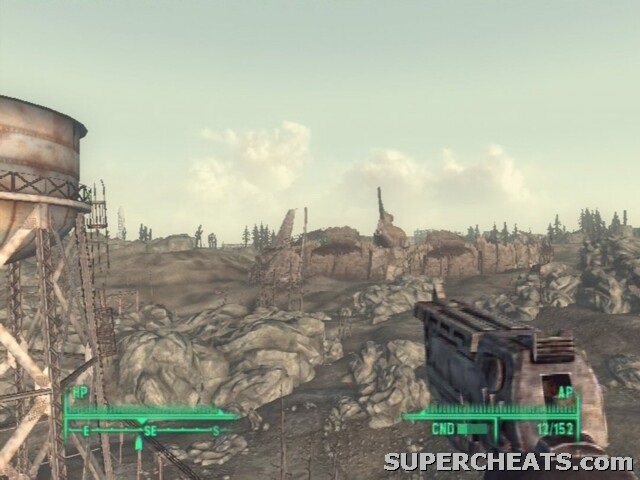 When your eyes have adjusted to the first daylight they've ever seen, head for Megaton. |
Now that you're on the worldmap, it's wise to bring up the worldmap, as in..map. Open the popit and you'll find the huge map under Data. Your next destination will be Megaton. Check your map several times, go past the robot guard and enter the town that sounds awfully similar to one of my favorite Decepticons.
Megaton:
Meet Lucas Simms, the sheriff of the town. You can start the Miscellaneous Quest (MQ): The Power of the Atom [MQ2] by agreeing to disarm the bomb for him. He'll send you over to Colin Moriarty's Saloon.
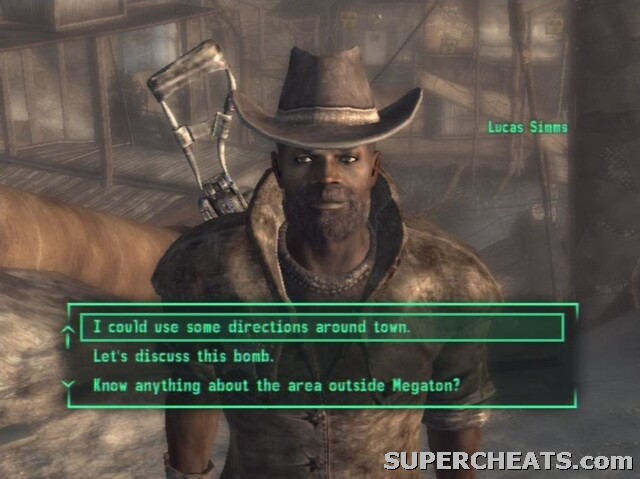 Simms is one of the good guys, a rare kind in the Wasteland. |
If you want to get rid of all your goodies from the vault, head into any shop and sell whatever you don't need. But be warned: Shopkeepers also have a limited amount of cash with them. You can buy a few Stimpaks to cover your expenses, though.
You need to find out more about where your dad went. What better place to start than the saloon?
Explore the town and check your Local Map to find the saloon marked. Enter the saloon through the front door, and talk to a woman on your right called Lucy West. You can initiate the MQ: Blood Ties with her. It's possible that she won't be around, in which case you'll have to look around town for her. Save your game and talk to the Ghoul. Act well mannered and you get the chance to ask him about your dad. You won't have a very high chance of success, but you can always reload your game; It gives 20 exp points, plus you get information about Moriarty's terminal in the back.
Head to the back to find Moriarty. You have several options once again. I suggest you:
1. Ask about your dad.
2. Tell him he's lying.
3. My dad told me I was born in the Vault.
4. Speech Challenge: “I was kidding”.
If the Speech Challenge fails, you can reload your savegame. Of course, you can also do the quest he asks you to do, which is about a junkie called Silver. This can net you some decent caps, so I suggest you go for it.
If you feel like it, head back to the worldmap and locate Silver on your map. When you arrive, reason with her to receive 300 caps, or do a Speech Challenge to receive 400 Caps. You can steal a lot from her house, but it will cost you Karma, it's up to you to steal: {PSYCHO}, {JET}, {CARTON OF CIGARETTES}, from the medbox a {BLOODPACK} and {2x STIMPAK}, and {BOBBY PIN x3} from the cabinet.
As you can see, it's not all that much, and if you get caught, Silver will take everything from you. You can also kill her for decent loot, but again you will lose Karma.
Fast travel back to Megaton by selecting it on your map, and pay Moriarty a visit. You can either pay up 100 caps and get the info, or you can lockpick his cabinet nearby the terminal and grab the password from there, but this will result in negative karma.
Using/Hacking the terminal will also cost you Karma, so choose wisely.
I suggest you head over to the Craterside Supply now and initiate the [MQ1.1] and [MQ1.2] quests for some very decent rewards. Search the tags to find the sections that cover these sidequests.
Fixing Pipes:
You can also look around for a character called Walter. He's either at the Saloon during nights, or can be found in or nearby the Water Processing Plant. He tells you that several pipes are leaking and need fixing. Help him out, will you? There are three pipes that need fixing, and you need a Repair skill of at least 30 to do this - which you should have by now.
1. The first pipe is on the main path when you enter Megaton and head downwards.
2. The second pipe is more to the southeast of the area, following the main path and taking a bend to the left upwards. If you look at your map, it looks like you're just below the Women's Restroom, except on a lower level.
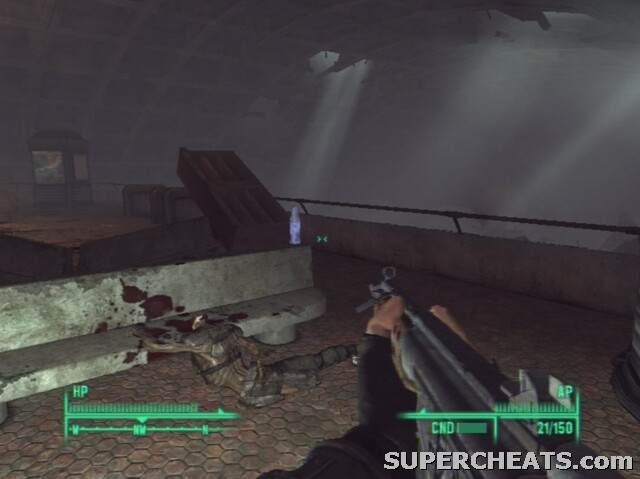
3. The third pipe is a little more tricky to find on your own. Locate the Children of the Atom building and take the stairs to climb its roof. Look around and you should be able to find a third squirting leak.
Head back to Walter ( 100 EXP, 200 Caps) who'll make you a Scrap Metal proposition that you can't refuse. Well, you can, but better take it anyway.
You have done a lot of things in Megaton now, so let's move on with the story.
With the right information in hand, it's time to proceed with the main quest. Head back to the worldmap and head to the direction of the marker (that is, if your active quest is the main quest). When you're about to cross the bridge north of the Super Duper Mart, instead of going over, take the lower path under the bridge. I suggest saving your game before proceeding to the Grenade Box at the end of the bridge, because a Frag Mine is set nearby. Disarm it (the higher your Repair, the better) and grab [FRAG GRENADE x3] from the nearby box. Continue your path, but be cautious as a raider or two will have their eyes set on you. Continue and make your way to the next dot on the map - in other words, discover Farragut West Metro Station. Be on the lookout for more raiders.
Follower: Dogmeat
Note: It's possible to obtain your first follower, Dogmeat, but it requires a bit of a trip to the north. Check your map and locate the large bridge crossing the river. The Scrapyard (where you're headed for) is two blocks north this road. You should also consult a map and look for Scrapyard.
Search the place and you'll find a dog fighting off some Raiders. Be good to him and he'll tag along. Some people send him away - which can cause him to go missing sometimes, but you can have him tag along. Check his health every now and then, and if he's severely injured, give him a Stimpak. How to see how much health he has left? Simply enter VATS.
Note: Dogmeat regenerates HP automatically when not in battle.
Note: ‘Perfect Gamers', take GOOD CARE of your dog and SAVE OFTEN.
Note: It's a given fact that Dogmeat runs off fairly easily. You can send him to Vault 101 and whenever you need him, fetch him from there.
Return to Farragut West Metro Station.
Check your map closely, and instead of following the next dotted line, move a little northeast from here - use your map - so that you're ‘above' the line. You can find a cart here with ammunition boxes that hold [5MM ROUNDS x73], [5MM ROUNDS x142], and [FRAG GRENADE x3]. The cart may be guarded by a Merc and a Protectron robot, so make a run for it after snatching the goodies - or kill them.
Sam Warrick:
Note: When you're exploring the area around the Farragut Metro Station, you may run into a Mercenary called Sam Warrick. If he bothers you (read: starts shooting at you) don't hesitate to gun him down, because he's a total douchebag that kills NPC's who give quests, and pretty much everything else that moves. You ask if he is part of a quest? Yes, but only for an optional part: You can make him a slave later on, and sell him for a measly 250 Caps. It's hardly worth it keeping him alive, and he holds a very neat Sniper Rifle you may want to snatch from him.
If he's not around, then he's not around. You'll meet him some other time then. Remember his name, Sam Warrick. Douchebag.
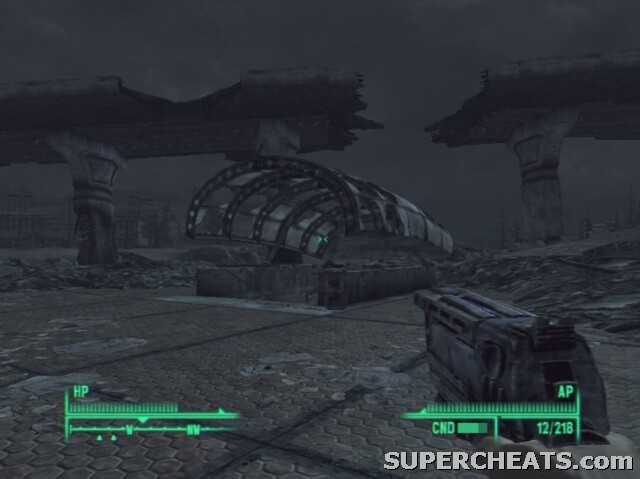 The entrance to Farragu West Metro Station. |
Farragut West Metro Station:
Head back to the Metro Station and go inside. The door on the right does not lead to much of interest. You can activate a Protectron robot by hacking the terminal, and you can find some [5.56MM ROUNDS] in a cabinet in the room NW. Instead, go straight ahead and kill a bunch of Mole Rats in the room ahead. You can use the sink to restore HP, but it will also increase Radiation. Since you can use a bed soon, I advise against it. Search the desk to find more [5.56MM ROUNDS].
 Did I tell you to beware of Mole Rats? |
Head downstairs, walk through the tunnel, and go upstairs again in what seems to be a boiler room. To the SE is a room with a bed, so heal up if you must. The desk holds [SHOTGUN SHELLS x10]. From the medicine box on the desk, you can grab a [BOBBY PIN], the [METRO UTILITY GATE KEY], [PURIFIED WATER], [RADAWAY], and a [STIMPAK]. Use the PC to open the safe and grab the [BOTTLE CAPS x35], [DCTA LASER FIREARMS PROTOCOL], [ENERGY CELL x55], [LASER PISTOL], [NIKOLA TESLA AND YOU], [PRE-WAR MONEY x2]. Now open the gate on the opposite side and blast a few Ghouls.
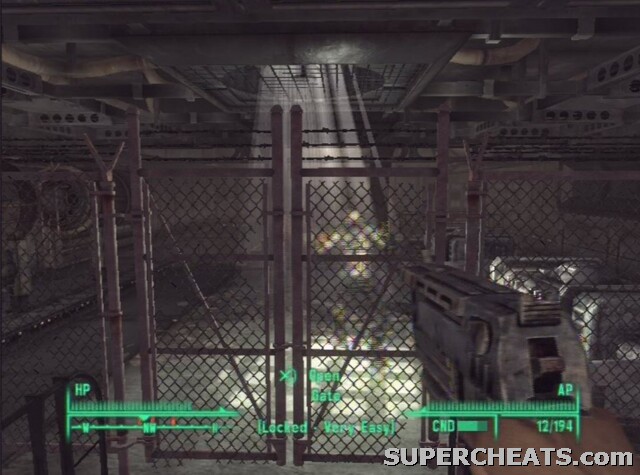 Beware of the gas and the gaseous ghouls. You don't even want to know how a gaseous ghoul smells when you know it of some human beings .. |
If you have a Lockpick Skill of 50 (use the Vault Utility Jumpsuit for 5) you can head downstairs and pick the door. Inside this room, you can find a whopping of [MISSILE x4], [U.S. ARMY: 30 HANDY FLAMETHROWER RECIPES], [10MM PISTOL x2], an [ASSAULT RIFLE], [FRAG GRENADE x2] and two Ammo Boxes with [5MM ROUNDS].
Open the next door above, head up a few flights of stairs and proceed to the next area: Tenleytown/Friendship Station. In this area, you can take two main paths: The tunnel to the east, and the tunnel to the south. Of course, you can also clear both tunnels and get all goodies.
Feral Ghouls have lost their ability to reason and will attack anything on sight that is not of their own race. Respond appropriately.
East Tunnel:
Head down this tunnel until you can take a right. Waste the Ghouls and check the dead Mercenary body to find a [LASER RIFLE] and [MICROFUSION CELL x40]. The First Aid Box holds [BLOODPACK], [PURIFIED WATER] and [STIMPAK]. Turn on your light if you hadn't already and search the shelves well to find a [LYING, CONGRESSIONAL STYLE] skill book and a [MENTATS]. You can also grab the Fission Batteries if weight is not an issue: Their value is 75 a piece, but they do weigh 10 each.
Proceed to the large wrecked area where plenty of Ghouls are roaming. Equip a decent weapon such as the Assault Rifle and dispose of them. Check out the tunnel at the very north of this large area to find another dead mercenary. Grab the [LASER RIFLE] and [MENTATS], loot his body, then head up the broken escalator stairs in the large room. Grab the lonely [NUKA COLA QUANTUM].
 Their glow makes Nuka-Cola Quantums easy to spot. |
Head into the tunnel and waste another group of Ghouls (and Radroaches). Head inside the room with the sign Employees Only, which is to your west, and search for a [STIMPAK] on the shelves. Head in the adjacent room and search for the [RADAWAY], [RAD-X], [.32 CALIBER ROUNDS] inside the desk, [CARTON OF CIGARETTES]from the Suitcase, and lean over the terminal to open the safe. This requires 50 Science Skill, but you can also pick the lock on the safe (50 Lockpick). Inside you'll find of relevance: [BOTTLE CAP x69], [ENERGY CELL x34], [LASER PISTOL].
The toilets don't hold anything but radiated sinks and, well, toilets. Figures. Exit to the worldmap and run to the escalators so that you have discovered Friendship Heights. Unless you want to fight a whole crapload of Raiders, I suggest you turn back and continue your way through the other tunnel I mentioned earlier on.
South Tunnel:
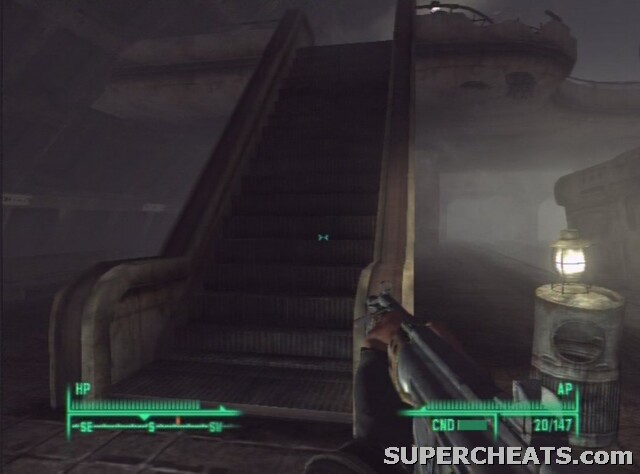 Head up the escalators and be on the lookout for a Super Mutant. |
Head south, walk past a Cola Machine, and follow the tunnel until you get to a large area with broken escalators, stairs if you will. I suggest you avoid the Super Mutant (if he's roaming around at all) and Ghouls, head up the escalators and head to the left. Make your way through the final tunnel to get to the next area, Chevy Chase North.
 Oh look, there he is! You'll come to recognize them quickly, as they all look the same, headless or not. |
Explore the area (head south) and you'll soon find that there are Super Mutants roaming here. Fortunately, a whole squad of the Brotherhood of Steel is also around, which makes the Super Mutants much easier to defeat. With the mutants out of the way, search for a member called Sentinel Lyons. In short, she allows you to tag along the way. How cool, you now have a whole squad to protect you!
Follow the squad and have them wipe out the Super Mutants as they proceed. Your job is to loot them, that's right. You can find many Hunting Rifles as loot, and you may want to repair one with another to save some weight. When you finally get to a big square and the fight between the squad and the mutants is over, make your way to the fountain in the middle and search the body of a squad member - who will always be there. Be sure to grab the [FAT MAN], which is essentially a large rocket launcher, along with a whopping of [MINI NUKE x8] that don't weight anything.
Use the Fat Man to launch a Mini Nuke or two, and the great Behemoth will fall swiftly.
Shortly after, a Behemoth (read: an oversized Super Mutant) breaks out of a building. To help the squad, stand back as far as you can and shoot a missile or two at it. After downing it, be sure to loot him and all other bodies.
For reference, I got this loot from the Super Behemoth: .32 Caliber Rounds x9, .32 Pistol, Bottle Caps x50, Electron Charge Pack x72, Frag Mine x5, Microfusion Cell x20, Missile x3. Also take the loot of Reddin, the killed member of the Brotherhood. Don't bother with the Power Armor yet, though - you've yet to train that Perk some other time during your main quest.
Talk to Lyons once more, then enter the Galaxy News Radio building by having the doors unlocked through the intercom.
Before you head upstairs, take a left and explore the rooms. You should be able to find a cola vending machine with a [NUKA COLA QUANTUM] inside. There is nothing of interest at the southern section of the building.
Head up the stairs on the north, make a quick right and enter the door leading to the GNR studios. Be sure to save your game, because another Speech Challenge is coming up, and this one can save you a lot of time. Upstairs, talk to Three Dog. Be polite and you'll eventually be give the Speech Challenge with a small chance of succeeding. If you do succeed, however, Three Dog will immediately tell you the location of your father, without having to do any favors to him! Simply reply after this that your dad could be of help.
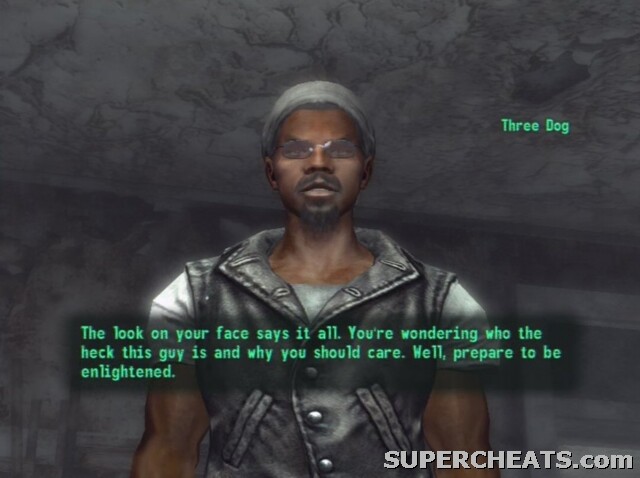 |
Three Dog is his name, and after hearing his bark for the tenth time on the radio, your ears will never be the same.
You can follow him into his room and talk to him some more to also receive the Galaxy News Radio quest.
However, should the Speech Challenge fail, you're required to do the Galaxy News Radio Quest first.
Note: Even though I highly recommend against it, you can kill Three Dog and be done with his silly quest. A special and unique quest called ‘The Search Continues' will start now, which is basically a quest in which you have to find Rivet City (southeast on the worldmap). The Brotherhood of Steel won't like this either - and you lose plenty of rewards - so, ehm .... don't do it?
no! just kidding i dont know!!![quote][/quote]
i broke the lock so is there a key