Inner Persephone
BioShock 2 Walkthrough and Guide
Inner Persephone
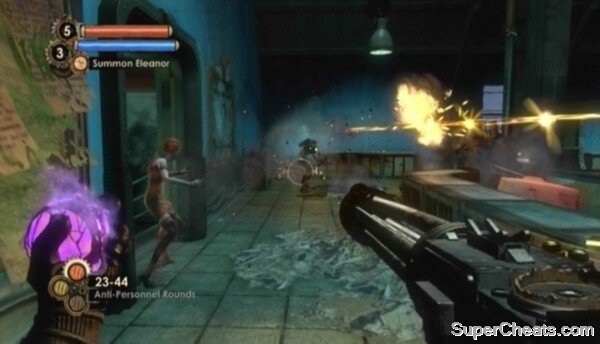
Approach Sinclair's lifeboat on the docking platform. A couple of Splicers will soon enter the area, so use the Summon Eleanor Plasmid and take them out.
Goal: Get to the Holding Wing
Get onto the second-floor walkway. Kill the Brute and Leadhead Splicers that appear and then enter the Holding Wing via the doorway at the south end of the walkway. The door into the next area is locked, but you can hack it open by shooting a Hack Dart at the highlighted Door Control panel visible through the broken window.
Goal: Override the Security Curfew
Proceed through the door and head to the other end of the corridor. In the room you come to, go through the door marked “Security Checkpoint A” in the northeast corner of the room. Make your way to the end of this corridor and enter the room there. There is an Audio Diary (Out With the Old…) on the desk here.
Return to the previous room after collecting the diary and press the highlighted Prisoner Admittance Button.
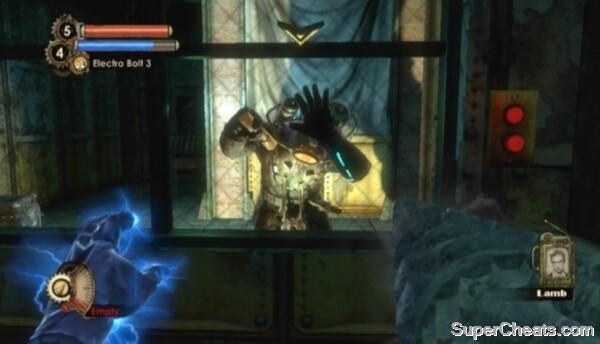 You need that key he's holding. |
Goal: Get the Key from Sinclair
After the scene, proceed through the door and head down the stairs. There is a Security Camera in the Cafeteria at the bottom of the stairs, as well as an Elite Brute Splicer and a couple of Leadheads. Hit the camera with a Hack Dart before entering the room and it will spot the Brute and sound the alarm, siccing two Security Drones on him.
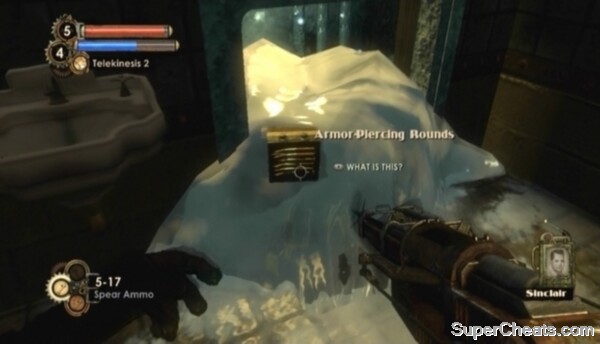
Look for an Audio Diary (The Definition of Despair) next to the corpse on the table in the northwest corner of the Cafeteria. Continue through the doorway at the south end of the Cafeteria, then through the double-door and down the stairs you come to. There is another Elite Brute Splicer here. Once he has been dealt with, melt the ice mound with Incinerate and collect the Proximity Mines.
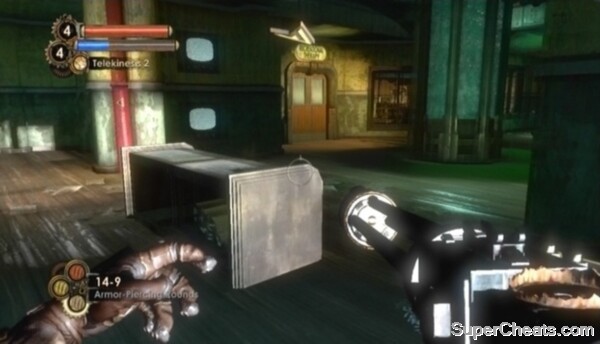
Exit through the opening in the wall. Shoot the Trap Spears blocking the way. Kill the two Leadheads in the next room and head up the stairs.
Sinclair is locked in the watchtower in the middle of the Holding Wing. There are two ways to get Sinclair out. One way is to enter the correct code in the Keypad to unlock the door. You'll need to piece together the code by listening to audio diaries found in the prisoner cells. The quicker way to get him out is by using the tunnel in the bathroom directly across from the watchtower door. Pay the 5 Dollars to open the gate and turn right upon entering. Melt the ice blocking the tunnel entrance with Incinerate and crawl through. Follow the tunnel and you'll come to a window. Use Incinerate to set fire to the oil visible through the window to draw Sinclair out. Then just crawl back through the tunnel, kill Sinclair and pluck the key from his corpse.
 Melt the ice mound in the bathroom and follow the tunnel to a window into the watchtower. |
Goal: Find the Keycode
Enter the Cell Block South Quad via the doorway at north end of the room. Enter the northwest cell and crawl through the opening in the wall to find the first Audio Diary (Last Two Digits).
Return to the main room and enter Block D via the door at the south end of the second-floor walkway. There's a Turret in here, so be ready with a Hack Dart. Enter the cell to the left and look for an Audio Diary (First Two Digits) in the toilet. Enter the cell to the right and look for an Audio Diary (A Trade) on the bed.
There are two more audio diaries and two gene tonics still to collect in the Holding Wing. Move through the opening in the wall of the northern cell in Block C to enter to Block B. Search the hanging corpse in Block B to find an Audio Diary (No More Hope Left). Look for the Elemental Sponge Tonic in the sink in the north cell of Block B. Enter Block A through the door at the north end of the second-floor walkway. Look for an Audio Diary (A Generous Offer) on the ground in the southwest cell of Block A.
 The Elemental Vampire Tonic is in one of the holes in Solitary Confinement. |
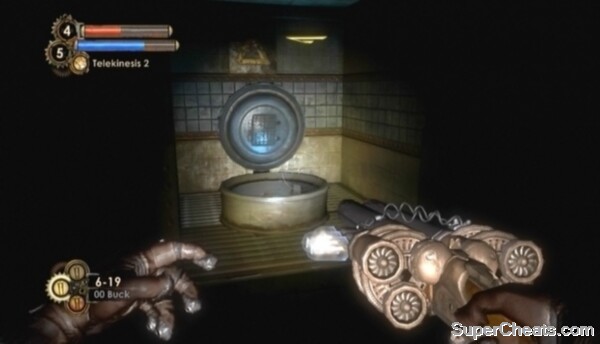
The Elemental Vampire Tonic can be found in Solitary Confinement, which is accessible through the door at the south end of the first floor. The Tonic is in an open cell on the flooded bottom level -- just look for a light blue glow. Two Houdini Splicers will appear when you pick up the Tonic.
Goal: Use the Key Code to Break In
When you have the audio diaries and two tonics, return to the watchtower door and enter 2673 into the Keypad to get at Sinclair. Note that even if you went after the code because you wanted to collect the audio diaries, it's still best to draw Sinclair out through the tunnel in the bathroom, as he is likely take a lot of damage from the fire and exploding barrels.
Killing Sinclair
Goal: use Sinclair's Key in the Tower
There is an Audio Diary (Magic Sauce) in the watchtower Sinclair was holed up in, as well as a Power to the People weapon upgrade station. Activate the Security Override when ready. Two Alphas will appear, but you're more than capable of handling them this far in.
Goal: Return to the Docking Platform
Fight your way back to the Docking Platform. You'll encounter Alphas on the way there. Just make sure you have Eleanor summoned.
Goal: Find the Pediatric Ward in the Therapy Wing
Back at the Docking Platform, enter the Therapy Wing through the door at the north end of the second-floor walkway. Move down the corridors until you come to a large, water-filled pipe. Enter the Recreational Therapy area through the door to the left of the pipe. Kill the two Splicers here and then search the corpse sitting on the couch by the window at the far end of the room to find an Audio Diary (Legs, Mouth, Arms, and Eyes).
With that, enter Intensive Therapy across from the Recreational Therapy entrance. Look for an Audio Diary (A Simple Question) next to the red chair at the north end of the room.
 Look for the Pediatric Ward in the Therapy Wing of Persephone. |
After collecting the two audio diaries, continue north toward the Pediatric Wing. There are a few more diaries to collect before entering the Pediatric Wing. Start by entering the room at the east end of the hall and look for an Audio Diary (Destructive Diary) on the Storage Crate in the corner.
There are two more diaries in the Administration Offices, which are accessible through the door at the west end of the hall. Upon entering the offices, head through the first door to your right and look for an Audio Diary (Sacrifices) on the shelf in the southeast corner of this room. Leave this room and go down the stairs straight ahead. There is a Leadhead Splicer and an Alpha down here, so be ready. Look for an Audio Diary (A Stratagem for Sinclair) on the desk in the northeast corner of the room.
Enter the Pediatric Ward when you have the three diaries. You must hold out in the Pediatric Ward as you are attacked by Alphas and Splicers. Summon Eleanor and this is easy.
Goal: Signal Eleanor in the Therapy Pediatric Ward
Press the highlighted Call Button when the ward is clear. With that, return to the Docking Platform. More enemies have spawned here.
Goal: Find the Pediatric Ward in the Infirmary Wing
When the Docking Platform is clear, enter the Infirmary Wing through the door at the west end of the second-floor walkway. Hack the Security Camera in the central room of the Infirmary Wing and then enter Ward A via the door in the southeast corner. Walk to the end of this hall and enter the door to your left to spot an Audio Diary (Such Freedom) on the bed there.
 Press the Door Release button on the pillar in the Quarantine Area to access the Power to the People station. |
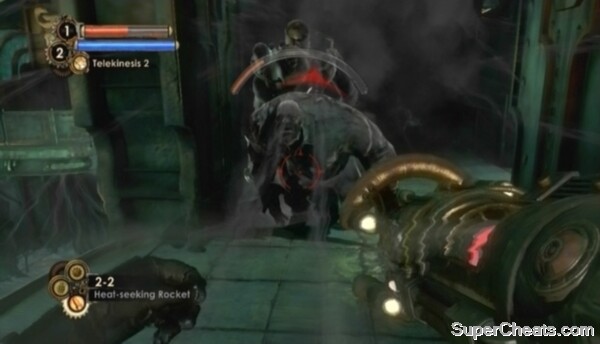
There is another diary to collect, as well as the last Power to the People weapon upgrade station of the game. Enter Ward B through the door at the northwest end of Ward A. Exit Ward B and approach the Quarantine Area door at the north end of the hall you come to. There is a Missile Turret down the hall to your right, so hack it to your side or use Telekinesis to throw one of its missiles back to destroy it. To open the doors in the Quarantine Area you need to press the Door Release button on the back of the pillar in the middle of the area. Doing so will release two Alphas, so be ready for a fight. The Power to the People station and Audio Diary (My Prison) are in the room with the Missile Turret.
Two more audio diaries to collect. Head up the stairs just outside the Quarantine Area and enter Surgery through the double-door to the left. Look for an Audio Diary (They Feel Pain) on the counter by the Mail Tube in the second part of this area. Exit through the double-door at the other end of Surgery. Before entering the Pediatric Ward, enter the Autopsy Room through the door at the north end of the walkway. Look for the final Audio Diary (Alleviating Pain) on the sinks behind the pillar with the hanging corpse.
 Summon Eleanor to your side for an easy fight. |
Enter the Pediatric Ward once you have the diaries. Again, you must defeat all of the enemies that appear before signalling Eleanor. This is easy with the Summon Eleanor Plasmid.
Goal: Signal Eleanor in the Infirmary Pediatric Ward
Press the highlighted Call Button at the south end of the ward when the area is clear.
Goal: Return to the Docking Platform
Make your way back the Docking Platform for the final push. Approach Sinclair's lifeboat to get started.
Goal: Survive Lamb's Final Assault
The Summon Eleanor Plasmid is disabled for the first part of this fight. You must hold off the Splicers until the water in the lifeboat is boiling. You'll be attacked by Leadhead Splicers and Alphas. Take out the Alphas with your Launcher, and the Leadheads with your Shotgun, Machine Gun, or Rivet Gun. There's a Vending Machine next to the Vita-Chamber at the back of the area if you need First Aid Kits.
Summon Eleanor with the Plasmid as soon as she gives word that she's available. Now many Elite Brute Splicers and more Alphas will spawn, so you definitely want Eleanor's help. Keep fighting until the water in the lifeboat is completely evaporated.
 Hold of the enemies until you can summon Eleanor. |
Goal: Throw the Vessel Release Lever
Activate the Docking Clamp Release on the control panel in the middle of the walkway.
Goal: Flood the Docking Platform
You must destroy the two highlighted pipes to flood the Docking Platform. The enemies are pushing really hard at this point, so you'll want to break the pipes quickly. Use Heat-Seeking Rockets if you have them, because Frag Grenades will just bounce off.
Shatter both tubes to flood the platform.
The Final Battle
Goal: Get to the Elevator
Follow the arrow at the top of the screen and enter the Escape Vessel to win the game.
Now sit back and enjoy the ending -- you've earned it! There are few different endings, but the actual ending video is determined by how you dealt with the Little Sisters. You'll see the good ending if you rescued all Little Sisters, the evil ending if you harvested all Little Sisters, or the neutral ending if you rescued some and harvested some.
No comments yet. Tell us what you think to be the first.