S3 M4: Bomb Crafting
Assassin's Creed Revelations Walkthrough and Guide
by CMBF ![]()
Sequence 03, Memory 04 -- Bomb Crafting
When we enter the North Imperial District Den before we can do anything else we have to complete the story mode mission that is also located here (it triggers its CS as soon as you enter the Den) called Bomb Crafting. So, let the CS play then accept the mission and use the Crafting Table to complete the Tutorial.
After you complete the tutorial and make three additional bombs you trigger another CS in which you ask him about the book -- and he tells you that Piri Reis in the Marketplace can tell you about the trading post you are looking for and teach you additional bomb recipes, so that is our next destination (it is marked on the map).
Exit the Den and head for the Marker and enter Reis' house, where you will get a CS with the man and learn the information you were seeking -- and then you talk about bombs. He explains his background and then you see the four paintings on the wall -- those each have two missions assigned to them, and those are where you flag the Bomb Missions, so let's do that now!
-- Poison Bombs --
The first mission from the first painting on the left is for Poison Bombs -- your assignment is to use the Poison Bomb to kill the Byzantine Templars and to gain 100% Synchronization for this mission you cannot use any ranged or melee weapons to kill the targets!
Accept the mission, then head to the marker and use a bomb to take out the group of Templar blocking the path. Once they are all dead carefully work your way along the corridor until you reach the next marker, and throw the second bomb through the open arch. Understand you have to do this the way the game WANTS you to do it. Try to pop a bomb over the wall and you will auto-fail...
You need to kill the last target (the isolated target) while remaining undetected. If they see you, you automatically fail this mission. Timing is everything here -- once you poison the second group THEN you can throw the bomb over the wall to poison the final enemy, and get 100% Synchronization! Now head back to Ries.
Basic Bomb Crafting
-- Thunder Bomb --
The CS has Ries telling you a little about the old days, and his naval adventures -- and then he hands you a bomb and tells you to use it with great care... Your mission is to interrupt a meeting of shady merchants using the bomb -- but to get 100% Synchronization you can NOT kill anybody!
When you arrive at the marker you will see a target on the wall -- you need to throw the bomb at the target to have it bounce into the center of the merchant meeting -- and then you need to immediately escape the area! Once you leave the yellow zone the mission ends and you get 100% Synchronization!
-- Smoke Screen --
Your next CS is a chat about Smoke Bombs -- to gain 100% Synchronization for this mission you must NOT kill anyone! So accept the mission and head to the marker where you will be instructed to use a Smoke Bomb on the guards -- then IMMEDIATELY head past them and use a second one on the other Guards and loot the chest by the wall.
Ass soon as you finish looting it, run like hell! It does not matter if they see you or chase you -- if they get close go to the rooftops and use a zipline. Once you are outside of their sight zone you end this mission and get 100% Synchronization!
-- Caltrop Bomb --
The next CS shows you the Caltrop Bomb -- and you get a little more of Ries' background story -- before being given the mission. To gain 100% Synchronization for this one you need to not swim...
Simply pop a Caltrop Bomb on the marker and then kill the Templar here -- if necessary pop a second one. Once they are dead escape the area!
-- Smoke Signal Bombs --
This CS tells you a little more about the map that Ries is working on -- then you ask him about Smoke Signal Bombs -- and he is happy to tell you about that!
He gives you some background on the bomb and then you accept the mission -- you must NOT kill anybody OTHER than your targets in order to gain 100% Synchronization. The idea here is to lure the sets of guards away from the alley and then take out the two marked targets -- so do just that!
Once you have decoyed the first pair of Templar groups climb the rooftops and go to the second marker. Drop a bomb onto the target spot and then when the pair of targets walk under you, do an air-assassination on them for the win! Good on ya mates! That is another 100% Synchronization!
-- Cherry Bombs --
Reis tells you about how the early Christians placed east at the top of their maps -- and then tells you about the distraction you can get from Cherry Bombs... Now in theory we already know about these, but hey, we do have to do the lessons, right?
The mission here is to use the Cherry Bomb to help the wounded Assassin escape -- and to gain 100% Synchronization we also need to create at least 2 conflicts between factions with guards each time. Hmmm...
After you drop the first bomb on the first target the Wounded Assassin will escape from the Hay Wagon when the Templar go to investigate. Go to the second marker and drop the second bomb, which will cause an Ottoman and a Templar group to come together and fight allowing the second Wounded Assassin to escape. Now in theory this completed the mission and you get the prompt to escape the area and the big yellow zone you need to escape out of -- but DO NOT do that.
You need to head up on to the rooftops and around to the left of where the first bomb was and you will find another pair of Ottoman and Templar guards below. Drop the third bomb between them, they will fight, and voila! You get 100% Synchronization you clever little devil you!
The Bomb Missions Walkthrough
 Unlocking the Pyromaniac Achievement |
-- Sticky Situations --
This time around we learn about Resin Bombs (Sticky Pouches) and a little more of the history of Reis and sadly, that he was on the opposite side in a war we were in. Ah well, accept the mission to learn how to use the Sticky Bomb by killing three targets in the high security area without being detected. To get 100% Synchronization we simply have to complete the mission without ever being detected -- and hey, we are good at that by now!
I have to admit this was a LOT easier than I thought it would be! All that we need do is walk to the marker, wait until the marked patrolling Templar is at the close-end of his route, and then pop a Sticky Bomb onto his back. He obliges us by walking over to the other two and BAM! All three are dead and we need only escape the area undetected for the win! Good on ya mates!
-- Tripwire Bomb --
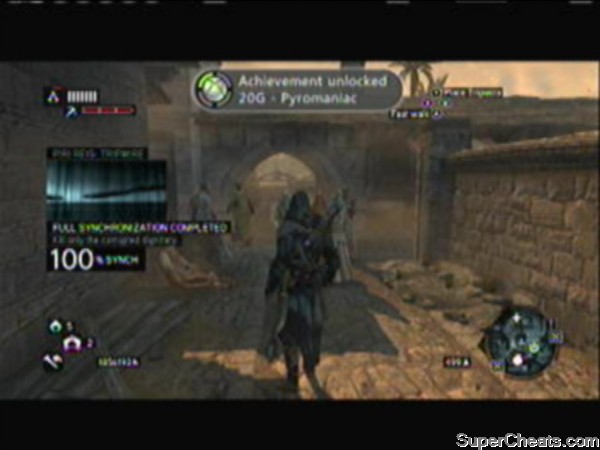
Our final lesson is a rather odd-looking bomb -- the Tripwire Bomb -- and as Reis explains the nature of it we share a little about our own character. This mission has us killing a corrupted dignitary with the Tripwire Bomb, and to gain 100% Synchronization we must kill ONLY the target, the corrupted dignitary, and nobody else.
In this case the Tripwire Bomb is a stink bomb, and when it goes off we simply need to rush forward and kill the dignitary and then escape the area for the win!
Completing this final mission unlocks the Achievement "Pyromaniac" (20 GS) for completing all of the Bomb Missions. Now head back to Reis' house and go inside, walk over to the Craft Table and activate it. You need to do the following steps:
(1) Dismantle all of the bombs in your inventory;
(2) Create one Splinter Bomb, one Blood Bomb, and one Cherry Bomb, then go outside and use RB to craft two more of each.
(3) Go back to the table and dismantle all of the bombs, then craft one Datura Bomb, one Caltrop Bomb, Smoke Decoy, then do the above step from (2) so that you craft 3 of each outside (not using the table).
Keep doing this with different bombs until you unlock the Achievement "Craft Maniac" (20 GS) for crafting 30 bombs. Now keep doing this until you have crafted one bomb of each effect type to complete the requirement for the Bomb Challenges just to be done with that.
No comments yet. Tell us what you think to be the first.