7: The Merchant of Venice
Assassin's Creed II Walkthrough and Guide
Assassin's Creed II Guide - Walkthrough
Sequence 7: The Merchant of Venice
Note that if you plan to synchronize the Viewpoints before starting the first memory of Sequence 7, you won't be able to reach the Viewpoint on the Santa Maria Gloriosa Dei Frari (the building more or less in the middle of the district) just yet. You'll need to complete the “Monkey See, Monkey Do” memory first, as the climb leap technique learned during this memory is needed to reach that Viewpoint.
Memory 1: Benvenuto
Speak to Leonardo at the docks to begin this memory. Follow Alvise da Vilandino through the streets of Venice. You'll eventually reach Leonardo's new workshop.
Memory 2: That's Gonna Leave a Mark
You must help Rosa get to safety. She's still quite fast despite being wounded, so try to keep up. She'll stop to fight guards along the way. You'll want to take them out quickly. Use your Long Sword in these fights; get behind enemies while they are preoccupied fighting Rosa and hit the X/Square button to effortlessly kill them.
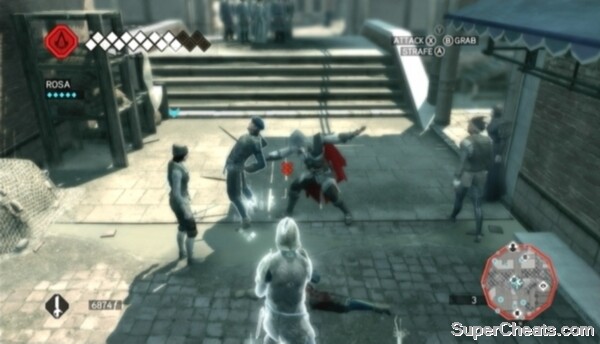 Help Rosa get to safety. |
Continue following Rosa until her wounds get the better of her and she can't go on. At this point, approach her and press the B/Circle button to pick her up. Hold RT/R2 and the A/X button to move faster. Ignore any guards that pursue you and carry Rosa over to the marker.
Once you've delivered Rosa to her ally, you then must kill the archers along the canal to protect the gondola. Start by free-running across the posts sticking out of the water to the south to reach the wooden walkway. Use your Hidden Blade to kill the archer there, then head west and kill the archer by the columns past the bridge.
Don't move too quickly. The gondola will stop moving if you're too far ahead, and moving even further away at this point will desynchronize the memory. Wait for the gondola to catch up by the crate at the east end of the walkway after killing the second archer. Free-Run onto the wooden balcony and then onto the wooden platform across from the third archer. Equip Throwing Knives, lock on to the archer and hit him with two knives to kill him. While the camera angle while locked on to the archer may make it difficult to see what you're doing, the knives will still hit as long as you are locked on to the target.
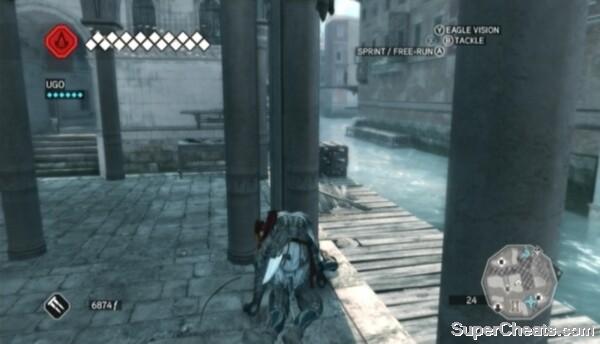 Kill the archers along the canal to protect the gondola. |
Cross the wooden beams to the platform across the canal, jump to the post and then to the crates. Equip your Hidden Blade and perform an Air Assassination on the first archer along this side of the canal, and then move in and kill the second archer further up. Kill the archer on the bridge and then wait for the gondola to catch up.
Free-Run toward the crate and post to reach the wooden walkway north of the bridge. Kill the archer there and continue down the walkway to reach another one. After killing the second archer on the walkway, look for some barrels covered by white cloth and Free-Run up to begin a Free-Run sequence. Make your way over to the archer on the wooden platform around the side of the building and ice him with your Hidden Blade. Move to the end of the platform and climb back down to street level.
Kill the two archers on either side of the Fast Travel Station and then follow the gondola west by free-running across the posts and wooden platforms along the buildings there. When the gondola comes to a stop, get down to street level to trigger a cutscene. After the cutscene, pick up Rosa and carry her to the table once her allies have cleared it off. Press the B/Circle button to place her on the table, triggering a cutscene and completing the memory.
Protecting the gondola
Memory 3: Building Blocks
Interact with the door marked on the map and watch the cutscene that ensues. Three memory start points will then be marked on the map. They can be completed in any order you wish, but it would be best to complete “Monkey See, Monkey Do” first, which can be started by speaking to Rosa just outside.
Memory 4: Monkey See, Monkey Do
After speaking to Rosa, approach the scaffolding to the south and Free-Run up to grab hold of the first grip point. Then hold RT/R2, push up on the Left Stick and press the A/X button to leap upwards. Press the B/Circle button at the height of your jump to Grab the grip point that would normally be too high to reach. Use the climb leap technique to reach the marker on the wooden platform to complete the memory.
Memory 5: By Leaps and Bounds
This memory is unlocked following “Monkey See, Monkey Do.” Make your way to the Santa Maria Gloriosa Dei Frari and speak to Rosa there to get started. The building can be scaled with ease using the climb leap technique learned in the previous memory. You have five minutes to make it to the top of the tower, which is more than enough time.
Climb up to the top of the tower, using the climb leap technique when necessary, and hit the marker on the Viewpoint. Synchronize the Viewpoint if you haven't already and then perform a Leap of Faith to land in the pile of hay below. Speak to Rosa to complete the memory.
Using the climb leap technique to scale the Frari
Memory 6: Breakout
Meet Ugo on the rooftop in the middle of the San Polo district and speak to him to start this memory. You must free three groups of captive thieves. The thieves are being held in cages around the district. Each cage is in the middle of a restricted area, meaning the guards there are on high-alert and will swiftly identify you.
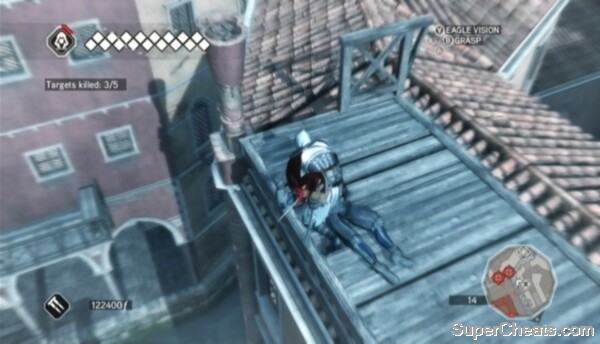
Follow any of the blue targets on the Mini-Map to reach one of the cages. You'll want to approach from the rooftops, since there are guards blocking the street level access points. Use Throwing Knives or the Hidden Blade to kill the archers along the rooftops. Position yourself on the rooftop above the cage, and then climb down to the top of the cage. One to three guards will be standing directly in front of the cage. Take them out with an Air Assassination from the top of the cage. Interact with the cage door to free the thieves once the area is clear
 Free the three groups of captive thieves and escort at least one from each cage back to Ugo. |
There are four thieves in each cage, but you need only get one back to Ugo. As with AI in most other games, the thieves' aren't the brightest, so while you should stick to the rooftops, keep it simple to avoid losing any of them along the way. Luckily there's some leeway here, since you only need to get one of the thieves back to Ugo.
Make your way to the green target on the Mini-Map and stand on the marker there. Wait for at least one of the thieves to reach the marker before starting toward the next cage. Open all three cages and get at least one thief from each cage back to Ugo to complete the memory.
Memory 7: Clothes Make the Man
Speak to the thief by the docks at the west end of the San Polo district to begin this memory. You need to collect some guards' armour and deliver them to Ugo. There are three chests marked by blue targets on the map. Each chest is guarded. You could stroll up to the guards in front of each chest and duke it out, but there is a trick to looting each chest without getting your hands dirty.
Start for the blue target nearest to you; jump across the posts east of your current location to move down the canal. Keep an eye on your left and you'll soon find yourself behind the row of guards blocking the way to the first armour chest. Hop from the post over to the chest, loot it, then jump back to the post and climb up to the rooftops.
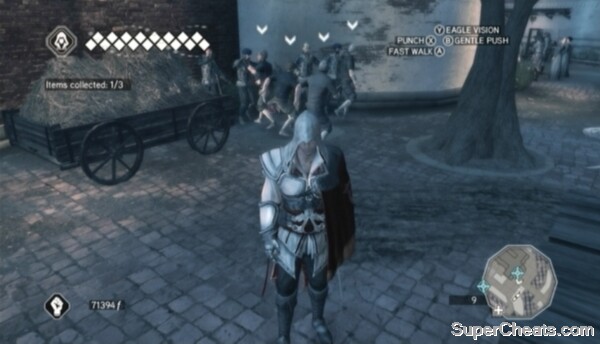 Use thieves to lure guards in front of armour chests. |
A second chest can be found in front of the Santa Maria Gloriosa Dei Frari. Four guards are blocking it. Look for a group of thieves just around the corner north of the chest and hire them for 150 florins. Then, approach the guards standing in front of the chest, lock on and press the Y/Triangle button to order the thieves to lure them away. When the guards start after the thieves, move in, loot the chest, and start toward the last one.
There's another group of thieves just south of the final chest. Hire them and use them to lure away the guards standing in front of the chest. Loot the chest and then climb up onto the rooftops, being careful not to step into the restricted area marked by the red circle on the Mini-Map just yet.
Approach the blue target on the Mini-Map and dive into the water. Swim to the boat, climb on, grab hold of the oar and start rowing toward the green target on the Mini-Map. Ignore the archers firing at you and continue rowing until you reach Ugo at the nearby dock. Row the boat into the marker and hop out to complete the memory.
Looting the armour chests
Memory 8: Cleaning House
See Antonio at his home to get started. You're after three treacherous thieves. You'll need to travel to each green target and use Eagle Vision to identify them. The thieves are somewhere within the green circles on the Mini-Map, but their locations appear to be fixed.
Make your way to the first green target just north of your current location. The thief should be on the boat north of the Fast Travel Station, but use Eagle Vision just to make sure. Jump across the posts leading up to the boat and grab hold of the side of the. Climb onboard and quickly kill the traitor with your Hidden Blade. There's no need to stick around and face the guards; just dive into the water and swim back to the docks.
The thief at the south-most zone should be alone on a rooftop. Use Eagle Vision to locate him, walk behind him and use your Hidden Blade to take him out. The treacherous thief at the final zone seems to move around a bit, but he should be walking along the water at the north end. Use Eagle Vision to identify him and assassinate him with your Hidden Blade to complete the memory.
Killing the three treacherous thieves
Memory 9: Everything Must Go
It's time to take down Emilio Barbarigo. Visit Antonio at his place to learn the plan. You first must kill the five archers along the rooftops south of the building so Antonio's men can take position. Make your way onto the rooftops and walk along them, taking out the marked archers with Throwing Knives or your Hidden Blade.
After the cutscene, climb back onto the rooftops and move closer to the palace. Just south of the palace, get down to street level and hire the group of thieves standing just before the archway leading to blocked passage. Order the thieves to lure the guards away. Wait for the guards to chase after the thieves and then move through. Approach the southeast corner of the building and start climbing, starting with the window there. You'll need to use the climb leap technique to reach the next window up.
 Kill the marked archers along the rooftops south of the palace. |
There's an archer on the balcony, so pull yourself up onto the ledge, equip your Hidden Blade and take him out with an Air Assassination. With that, climb up the windows to reach the roof. Emilio is inside the palace; you just need to get yourself in a good position to take him out swiftly. There are some archers along the rooftop, so make your way north and dispatch them with your Hidden Blade. Start east when you reach the north end of the palace roof.
At the east end of the roof just before the turret, drop down to the grab hold of the window sill where an archer is and use your Hidden Blade to assassinate him from the ledge. Once inside the palace, you just need to get close to Emilio. Jump to grip the balcony along the east wall, and then over to the walkway at the south end. Emilio should be right in the hallway here; quickly Sprint after him and perform a High Profile assassination with your Hidden Blade.
The remaining enemies will be taken care of by your allies after the cutscene. Follow Rosa to the gate to trigger another cutscene, completing the memory and the sequence.
Assassinating Emilio Barbarigo
No comments yet. Tell us what you think to be the first.