Part 04: Rome, January 1500
Assassin's Creed: Brotherhood Walkthrough and Guide
Part 04: Rome, January 1500
Expanding the map detail from on high
We are now fully-rested thanks to the kind-hearted woman, but we are not fully-healed. To get healed we are going to need to find a Doctor,
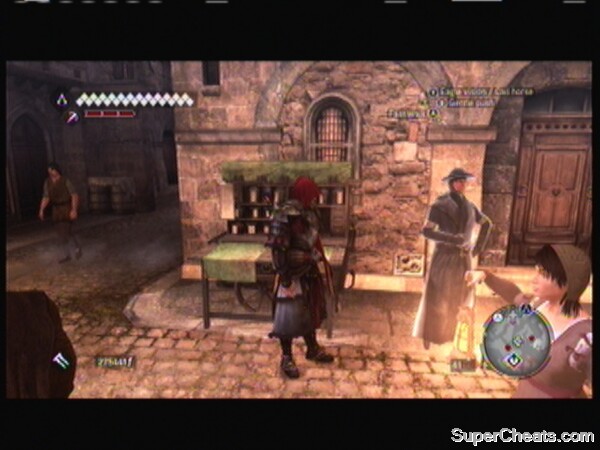
We are now wearing our familiar uniform -- as far as restarts go following serious trauma, this one is working out pretty good! On screen we are being prompted to accept the facts of life: we are almost as good as new, but we need to find a doctor in town to heal our wounds from the Villa attack, and then we need to climb the church tower. But before we do that -- you knew that there was a "but" coming, right? But before we get too far into the next area there are a few minor items we need to address.
Opening the Pause Menu will now show us our current objective and the details about it -- so take a look now and get used to checking that. We need to find a doctor, and we must not drop below 1 full health square -- easey-peasy!
-- DNA Menu --
Now open the DNA Menu, and you will see that the first chain, representing Sequence 1, is complete. Highlight it and hit the action button and you will now see that you can select individual sections from within it! Clicking on the individual memory gives you the details -- we cannot actually replay that memory at the moment -- and we do not want to anyway right now -- but this is where you will go when you do want to, right?
Now back up to the main level of the DNA and move all the way to the right -- do the one labeled Additional Memories -- hit the action button and you can now see that it is divided up into sections, showing you the status of the collections for Viewpoints, Borgia Flags, Feathers, and Treasures, with the Flags divided by area. How cool is that?
A quick check of our Inventory shows that we are flat ass busted -- we have no money at all thanks to Borgia, so getting money, as well as some decent kit, is a very high priority right now! The only weapons we managed to hold on to are our Hidden Blade and a Common Sword -- the Hidden Blade was strapped to our arm, which explains why we still have that...
We also have 5 Throwing Knives, 5 vials of Poison, 6 Bullets, and 4 vials of medicine, which means our pouch must have been strapped to us as well, right? The only other kit we have is a Plain Cape and our Assassin's Guild Robes. Bummer.
A quick look at the map will reveal the location of the Borgia Towers in the city - we need to climb those to reveal their sections of the map, something that should be part of our main set of goals at this point in the game. Right, so that takes care of the things we needed to look into, so back into the world you go mate! Time for us to find that Doctor!
Now before you start off on this quest, do yourself a bit of a favor mate, and use one of the vials of medicine that you have in your pouch! That will not repair your arm, but it WILL recharge your health, and since at the moment you are down to one full square, and you cannot go below one full sqaure, any hit you take would have effectively ended the level, forcing you to restart it. By using a med vial you at least do not have to worry about a premature restart!
 Visiting the Doctor |
-- Off to see the Doctor --
We are too badly hurt to do any running, climbing, or jumping, so just take your time, do not draw attention to yourself, and work your way down the stairs to the street. Our destination is clearly marked on the map, and on the radar map on the main screen, so head there now.
Our horse is in the street outside the house, and you could grab it now I suppose, but that will get in the way of some of the things that we need to do, so I suggest not...
Follow the road towards the marker on your map to meet the Doctor -- and get a Checkpoint Save -- then talk to him. The Doctor gives you the treatment that he believes that you need immediately, and suggests that you seek out some of his colleagues for further treatment, not that you will be doing that any time soon mind you.
You will now be prompted to use the Wheel Menu to use a medicine -- but we already used the meds to restore our empty health boxes before so there is no need to waste one now just to comply with the prompt, as it does not actually care if you do it or not! The command wheel, which is now available by pressing the Right Bumper, is your fast track to selecting weapons, kit, and health items, so go ahead and open that now; get familiar with it, as it will be your new best friend for the rest of the game!
Our ability to run, jump, and fight has now been restored -- yay! Before we do anything else, we need to address the issue of our purse -- and it being empty. The best way to do that at the moment is to steal some money from the crowds in the street, so why don't you move through the crowds to perform your very first pickpocketing offense in the game?
Pickpocketing is actually very easy to do, but you do not want to remain in the general vicinity of your victim after doing it. Simply begin walking through the crowd and hold down the A Button. When you get near a person you will automatically pick their pocket -- you will know it worked because you will see the amount of money you have stolen appear on screen.
Do that a few more times to build up some pocket money so we do not have to worry about having the price of some medicine or a cup of coffee, and then make a quick check of our Objectives by hitting the Pause Menu. This now shows that climbing the Church has replaced finding the Doctor as our next goal, which makes sense -- we have completed the first stage, and found the Doctor, so now if you are done stealing money it is time to head for the Church marked on the map!
-- At the Church --
Remember that running in the city and near crowds raises the awareness of you by guards, snitches, and busy-bodies in the area, so you want to be sneaky-Pete for now, right? Pay attention to the radar map as it will show you the location of any enemy units by depicting them as a red dot -- we want to avoid those for now, right?
On your way to the Church there should be a few more crowds whose pockets you can pick, so that by the time you arrive there you will have a comfortable 200 or 300 Florin in your pouch, which is plenty for now.
When you reach the church, go around to the back (the opposite side from which the red dot on the radar that represents a soldier is displayed) and climb the very center of the taller area -- when you reach the roof you will automatically pick up the feather that is laying there, gaining the first of the 10 feathers for this area! Good on ya!
The tower you need to climb is ahead on the front side of the roof, so go there and climb it now. On top is a wooden perch, and when you step out onto it you will be prompted to hit the Y Button to look out at the area. Doing this expands the details that you know about for the immediate area on your Map, so after hitting Y take a quick look at your Map and you will notice that there is now a fair-sized circle of detail added to it!
On the Map if you hit the Right Bumper you get a view of the city sliced up by areas of influence -- and specifically the areas in which the Borgia have influence. When this is all over, you will have redrawn that map completely, destroying their power base here in Rome!
Each of the towers marked on the map has a similar perch, and visiting them all as well as any non-tower ones will allow you to properly fill in your Map details, which is actually something we want to do right away.
-- After the Church --
When you follow the prompt, diving from the tower to the wagon of hay below, we are confronted with a new task! We overhear the guards talking trash and realize that we need to follow them... Now.
When it is safe to do so unobserved, exit the wagon and begin to follow the guards -- do not run, do not dwaddle. If you get too close to them, a 25-second timer begins and you have to put enough distance between you and the guards so that they cannot recognize and detect you. If you let them get too far ahead of you, the same timer starts and you have to close the distance with them so that you do not lose them! The timer is very obvious and easy to spot, so if you see it you know you have to act.
The path they are on doubles back twice so you are bound to get the timer when that happens -- do not lose your cool, simply keep heading away from them along the path and you will be fine. If they get too far ahead of you or you get too close, regardless of how much time the timer says you have left, you will fail the mission. Don't fail the mission.
They will lead you through the city and, eventually, arrive at the plaza that is their destination. You will know that this has happened because they will spread out, attack a man, and you will get a Checkpoint Save. Once that happens, wade in and start killing them. When you kill the last one you will get the notice that the memory has fully synced up, completing the mission, after which you can move to the glowing man and talk to him to hear his story.
His wife was hung by the officials for a crime that he says she did not commit, and his pain is made worse by the edict that was passed that forbids him to cut her down and bury her; her body is intended to remain on display as a warning to other criminals.
-- Mission: Well Executed --
This triggers the next mission, called Well Executed, the goal of which is to dispatch the official using your Hidden Blade. After you accept the mission, you tell the man to cut his wife down when he is ready to do so, that you will deal with the official. At this point you get another Checkpoint Save, so if things go sideways you can always retry from here.
The easy way to reach the marker on the map is to head to the west of it into the area of the map that has not been revealed and climb the buildings there to approach the villa on top of the hill from that side.
When you make the killing blow it MUST be with the Hidden Blade -- anything else used will fail the mission. If you mess up and use your sword or some other weapon when the screen does the white background close-up of you talking to the victim it will tell you that you did not obtain a 100% Sync. If that does happen, hit the Pause Menu, then DNA, and select Sequence 2 then the mission Well Executed, and reload it to unlock the Achievement "Deja Vu" which is worth 20 GP. That Achievement is for reloading a DNA Sequence, so you take a mistake and turn it into a bonus!
If you use the Hidden Blade you will get 100% Sync on Sequence 2, Memory 2, so kudos to you!
As you move through the town keep your eyes out for small orange boxes tucked away near walls -- these can be looted for Trade Goods, some of which are part of side-quests, while others are just worth money that you can sell. If you end up using up your medicine supply, be sure to head back to the Doctor to re-supply your kit, and if you do head back do not waste the walk, pick some pockets on the way!
Having completed the mission, now would be a good time to look for some perch points and add some detail to the map -- too bad we cannot do that right now!
No comments yet. Tell us what you think to be the first.