Vampire Castle Part 2
Thank you for printing this page from www.SuperCheats.com.
Remember to come back to check for updates to this guide and much more content for Bravely Default
Follow this guide to hear about updates
Last Updated:
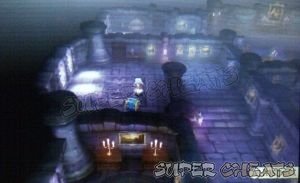
After getting all the keystones, heal up then return to the Vampire castle.
1F
Check the corridor in the southeast corner to get a Dragon Fang. There’s a hidden passage in the southwest corner that leads to a Blood Blade. Just north of that passage lies a locked blue chest to the west. Continue to the middle of the floor for a scene. After that, head to the west to find a Safety Ring. Once done, take the stairs to the northeast to reach the second floor.


2F
Check the southeast corner to find a Hermes Shoes. Continue to the west to find a Black Chest from the chest in the southwestern corner. Head to the large room in the middle and examine the painting to view another scene. After viewing this scene, another party chat will be unlocked. (Lord DeRosso’s Epic Oratory) Use the stairs to the northwest to continue with the story.

3F
Head directly to the south to find the last item in this floor. Loot the Soul of Thamasa from the chest. Now follow the long, winding corridor until you reach the large room in the middle of the floor. Inspect the painting again to trigger another scene. Head to the right and take the stairs leading to the next floor.

4F
Follow the path and loot the Dwarven Gloves from the chest in a small corridor along the way. Now head to the westernmost corridor and follow it to find a Hyper Bracer inside a chest. That’s all the treasures in this floor so backtrack a bit and head to the north. Examine the painting again in the middle of the room for another scene. After that, go upstairs to the left to the next floor.
5F
There will be two corridors leading south; take the one to the right to find a chest at the end. Open it to get Magic Armlets. Follow the corridor to the left this time and when you see a split, go up and right to find another chest. Loot Lamia’s Tiara from it. Follow the straightforward path until you reach the room in the middle. Examine the painting again for another scene. After that, head east and go upstairs again.
6F
There’s only one chest on this floor and that’s located in the eastern side. Loot the Megalixir from the chest and head west. Follow the path again until you reach yet another room with the painting. Examine the painting again for another scene. Continue to the west and go upstairs again.
7F
Follow the path and examine the painting. Continue forth and open the last chest located in the northeast corner. You’ll obtain Lilith’s Rod from it. Before moving on, prepare your light-based weapons and have someone take the form of a Templar. When ready, save your game and approach DeRosso to fight him.

You only need one major healer but do keep a backup healing job or medication. It will also help keeping a good-leveled Performer (main or backup) as its One More For You is necessary to keep your main attackers supplied with much needed BP. A potent healer with Healing Lore or Holy One will be a good way on keeping everybody healed up.
| Boss: Lord DeRosso |
| HP: 150,000, Weakness: Light, FAM: Human |
 |
| Graviga deals damage based on the percentage of your max HP. He can also steal stored BP using Battle Thirst which he will then follow up using an all-party attack called Energy Burst. If you see him steal a BP from you, put your characters on Default the next turn since he will surely use Energy Burst. Prioritize keeping everybody healed up since he has another move called Bone Crush that will specifically target characters with low HP. This move will deal no damage as long as your party is pretty much healed up. The Templar’s Radiant Blast has good damage output by default but you can further enhance it by buffs and by debuffing DeRosso. |
After the battle, you’ll receive the Megalixir and the Vampire asterisk. Once done, examine the last painting to learn more of the story. Now you’re done here. Attempt to leave for another scene with Lord DeRosso then leave the place using a Teleport Stone for your convenience.

Anything missing from this guide?
ASK A QUESTION for Bravely Default
Comments for Vampire Castle Part 2
Add a comment
Please log in above or sign up for free to post commentsTable of ContentsClose
- Basics
- Asterisks / Job Classes
- Jobs Guide
- Extras
- Intro
- Chapter 1
- Chapter 2
- Chapter 3
- Chapter 4
- Chapter 5
- Chapter 6
- Chapter 7
- Chapter 8
- The End
- Sub-Scenarios (Ch1)
- Sub-Scenarios (Ch2)
- Sub-Scenarios (Ch3)
- Sub-Scenarios (Ch4)
- Sub-Scenarios (Ch5)
- Sub-Scenarios (Ch6)
- Sub-Scenarios (Ch7)
- Sub-Scenarios (Ch8)
Guide Updates
Get notified of updates to this guide
Many of our guides get updated with additional information. To get an email when this guide is updated click below.
 Join us on Discord
Click to close
None of his damaging attacks, save Graviga (which cannot kill you) can hit you if you use Utsusemi. Combine this with the Transience and Counter Amp abilities for a ridiculously cheap (but lengthy) victory.