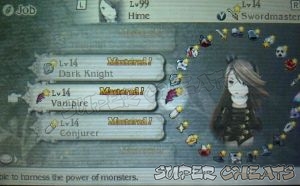
To get these abilities, you must unlock the Vampire job first. Refer to these links for more details.
Vampire Castle Part 1
Vampire Castle Part 2
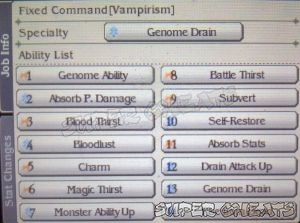
There are 25 Genome abilities that you can learn. A character with the Vampire Job or has equipped the Genome Drain support ability will learn certain abilities after getting hit by an enemy that uses it. After learning by anyone in your team, anybody who switches to the Vampire job will have access to the learned ability.
Take note that for some genome abilities that inflict status ailments, getting hit by them doesn't automatically allow your character to learn it. You have to either resist it or evade it to learn it. A couple of good examples are Venom, Wing Scales and Paralyzing Pollen. So if Venom hits your character and he/she gets poisoned, you won't get the ability. That character should resist the attack to learn it.
There are also four Genome abilities you can learn but are not listed in the journal. These can be learned from the Nemeses sent via Streetpass or by updating your game data online.
- Firaja - Learned from Belphegor
- Thundaja - Learned from Asmodeus or Belphegor.
- Blizzaja - Learned from Mammon or Belphegor.
- Aeroja - Learned from Lucifer
Genome Abilities List
| 1: Curse |
| Lowers a target's Physical Attack and Physical Defense by 25% for four turns. |
| Learned from: Magicians |
| Location: Underflow West (Chapter 4), Dimension's Hasp B8 |
| |
| 2: Spray |
| Unleash a water-based physical attack on target. Default doesn't reduce damage from this attack. |
| Learned from: Marine Devil / Deathfish |
| Location: Open seas (Chapter 5 onwards) / Dimension's Hasp B3 |
| |
| 3: Venom |
| Deal the same damage as a conventional attack and inflict poison (high probability) on a target |
| Learned from: Red Flan |
| Location: Underflow West (Chapter 4), Dimension's Hasp B8 |
| |
| 4: Wing Scales |
| Deal the same damage as a conventional attack and confuse (high probability) the target |
| Learned from: Great Moth |
| Location: Vestment Cave (Chapter 4), Dimension's Hasp B6 |
| |
| 5: Firestorm |
| Deal fire-based damage to target and lower P.Def by 25% for three turns |
| Learned from: Flame Moth |
| Location: Underflow 1F West (Chapter 5 onward), Fire Temple |
| |
| 6: Tornado |
| Unleash a wind-based physical attack on all enemies |
| Learned from: Rukh |
| Location: Miasma Woods (Chapter 5 onward) |
| |
| 7: Blizzard Blast |
| Unleash a water-based physical attack on all enemies |
| Learned from: Ice Golem |
| Location: Eternia Central Command (Chapter 5 onward), overworld map (Chapter 5 onward) |
| |
| 8: Dual Attack |
| Randomly unleash 2 physical attacks on all enemies |
| Learned from: Catamount |
| Location: Witherwoods (Chapter 4), Dimension's Hasp B6 |
| |
| 9: Chomp |
| Reduce target's HP to 1 (50% chance). Doesn't work on bosses |
| Learned from: Valtora |
| Location: Eisenberg overworld (Chapter 5), Dimension's Hasp B5 |
| |
| 10: Blaster |
| Paralyze all enemies (medium probability) |
| Learned from: Zwart |
| Location: Twilight Ruins (Ch5 onwards) |
| |
| 11: Paralyzing Pollen |
| Deal the same damage as a conventional attack and paralyze target (high probability) |
| Learned from: Alraune |
| Location: Florem region (Chapter 4), Dimension's Hasp B6 |
| |
| 12: Fireball |
| Target one enemy with a fire-based physical attack that ignores physical defense |
| Learned from: D'Gon, Bahamut (Ominas Crowe's pet) |
| Location: Witherwoods (Chapter 4), Dimension's Hasp B7 |
| |
| 13: Bone Crush |
| Damage each enemy by the same amount that all enemies' HP has gone down. Requires 2 BP and doesn't work on bosses |
| Learned from: Skull Lancer |
| Location: Mythril Mines (Chapter 5 onward), Underflow (Chapter 5 onward) |
  > > |
| 14: Withering Silence |
| Deal same damage as a conventional attack and inflict silence (high probability) |
| Learned from: Kobold |
| Location: Norende Ravine, Caldisla overworld map |
| 15: Earthquake |
| Unleash an earth-based physical attack on all enemies |
| Learned from: Soil Eater |
| Location: Eisenberg overworld (Chapter 4), Dimension's Hasp B5 |
| |
| 16: Sandstorm |
| Unleash an earth-based physical attack on all enemies and inflict blind (medium probability) |
| Learned from: Sand Worm |
| Location: Harena overworld (Chapter 4), Dimension's Hasp B5 |
| |
| 17: Gastric Juices |
| Deal the same damage as a conventional attack to all enemies and lower their physical defense by 25% for 3 turns. |
| Learned from: Gastric Worm |
| Location: Everlast Tower (Chapter 4), Dimension's Hasp B8 |
| |
| 18: Rock Storm |
| Unleash an earth-based physical attack on all enemies |
| Learned from: Megascolides |
| Location: Everlast Tower (Chapter 5 onward) |
| |
| 19: Toxic Whirl |
| Unleash an physical attack on all enemies and inflict poison (medium probability) |
| Learned from: Kaiser Cobra |
| Location: Everlast Tower (Chapter 5 onward) |
| |
| 20: White Wind |
| Restore HP to all allies by the user's current HP amount. |
| Learned from: Aero Lantern (You have to charm these monsters to have them use White Wind on your party. The Vampire’s LV9 skill “Subvert” is perfect for the job) |
| Location: Temple of Wind (Chapter 4), Dimension's Hasp B7 |
| |
| 21: Lullaby |
| Inflict sleep on all enemies (medium probability) |
| Learned from: Treant, Hamadryad |
| Location: Miasma Woods (Chapter 5 onward), Dimension's Hasp B5 |
|
| 22: Hellfire |
| Unleash fire-based physical damage on all enemies |
| Learned from: Cerberus, Orthos (Wind Temple Boss) |
| Location: Vampire Castle, Temple of Wind |
| |
| 23: Deep Freeze |
| Unleash water-based physical damage on all enemies |
| Learned from: Orthos (Wind Temple Boss) |
| Location: Temple of Wind |
| 24: Aqua Regia |
| Inflict water-based physical damage to the target and lower its physical defense by 25% for four turns. |
| Learned from: Rusalka (Water Temple Boss) |
| Location: Temple of Water |
| 25: Energy Burst |
| Inflict damage 1.5 times the conventional attack to all enemies. Requires 1 BP to use. |
| Learned from: Lord DeRosso, Chaugmar (FireTemple Boss) |
| Location: Vampire Castle, Temple of Fire |
Credits to the following references:
Gameskinny
Gamefaqs BD Board


 Join us on Discord
wololo
voltora appears not in my game at chapter 5 D:
Lullaby can be learned in chapter 4 very easily from all tree enemies
So if you've passed a chapter that a creature yielding one of these moves was in, you can never acquire that move?
ժҽʍղեíօղտ հɑտթ íտ ϲհɑթեҽɾ 8
I would love it if this was put in order of place to get, but really thanks!
I can confirm-Sand Worm is in Dimension's Hasp-B2, not B5.
there one more bone crush learned from lord derosso cost is 2bp
Don't forget the secret abilities! These aren't listed in the journal, they all cost 99 MP, and are all learned from nemeses:
Firaja
Spell that does tremendous fire damage to all enemies.
Learned From: Belphegor
Location: Norende Village Restoration
Thundaja
Spell that does tremendous lightning damage to all enemies.
Learned from: Asmodeus or Belphegor
Location: Norende Village Restoration
Blizaja
Spell that does tremendous ice damage to all enemies.
Learned from: Mammon or Belphegor
Location: Norende Village Restoration
Aeroja
Spell that does tremendous wind damage to all enemies.
Learned from: Lucifer
Location: Norende Village Restoration
All of these bosses have a level requirement between 70 and 99, so good luck!
(Of course, since Belphegor can use 3 of those, I'd fight that one first, it should make it a little easier.)
Sand worm is prob on Hasp b2